Since the turn of the century, the Windows platform has become the preferred choice of many gamers. The game developers adopted the Windows platform and this has led to Windows becoming the next default in terms of gaming.
As time progressed not only did the gaming ecosystem evolved but also Windows started seeing major transformation with each new iteration. The latest generation of Windows as of now is the 10th iteration of the operating system.
Windows 10 is so much different in comparison to the previous generations and contains much more features as well. All of these features are not always for better in terms of gaming and although with each iteration of Windows Microsoft promised to optimize the gaming performance the ground reality is quite opposite.
Despite being the home of gaming and the preferred platform of many developers Windows 10 still lacks proper optimization for gaming. Running Windows at the default settings leaves so much untapped performance on the table but do not worry as we in this article will give you 16 tips that you can follow to optimize Windows 10 for gaming. This will help you achieve a better frame rate in games. So, without further ado let’s get on to some optimizing, shall we?
1: Enable Game Mode
The game mode is a feature baked into Windows 10 that optimizes your PC for gaming. When enabled this mode automatically makes tweaks to windows for the most optimal gaming experience. This feature can be enabled by
- Open the windows setting by hovering over to the setting icon or by pressing the Windows + I key.
- In the setting menu, navigate to the gaming option and open it.
- A window will help. Here select the game mode tab.
- Check the box under the game mode option to enable it.
A quick note here that Game mode is not necessarily the best for every game so if you are experiencing any weird issue after enabling game mode then be quick to disable it.
RELATED:
Gaming PC Under $500
2: Disable Apps that Open Automatically when Windows Boots
I am sure we have all faced the situation of apps automatically starting after we boot into windows. Closing the apps, again and again, every time the PC starts is annoying and inconvenient so the first thing that should be done is to disable these apps from automatically starting. To this use the following steps
- Open windows settings
- Click on the option named Apps and open it.
- In the new window that pops up navigate to the startup option.
- This will display you all the apps that automatically start up with windows.
- Disable the apps that are not needed and restart your PC.
Upon restarting you will notice that the PC now boots much faster and is also smoother to use.
3: Disable Background Apps
By default, Windows 10 allows apps to run in the background. These apps eat the RAM and the CPU leading to worse performance in games than otherwise, your PC would be capable of. To disable the apps head over to the windows settings and do the following.
- Open the privacy setting of the windows that will be present in the windows setting menu
- Navigate over the background app option and select it by left-clicking.
- Uncheck the let apps run in the background option or you can also individually disable that you see are worthless and keep the necessary ones. Anyways when done exit the setting menu and restart the menu.
Disabling the background apps option will restrict any application from utilizing the assets of the PC that would otherwise be going to the game you are playing. Hence as a result you will see more FPS is games.
RELATED:
Best Gaming PCs Under $1500
4: Uninstall the Bloatware
We tend to download applications impulsively and then most of these apps get by unused. Although not used these apps do passively take away from computing power that would otherwise be allocated to the game you are people. Getting rid of these unused apps also cleans up storage space for more games.
- Head over to the control panel by searching for it in the windows search bar or by clicking on its icon.
- In the control panel head over the program section and click on uninstall or change a program option.
- On doing this a new window will open with all the apps installed on the PC. Right-click on the ones that you do not use and uninstall them.
5: Turn of Automatic Windows Update
If you are experiencing lag or stutter when playing online games, chances are the windows update is the culprit for this. By default, Windows 10 automatically installs new updates regardless of what is happening on the PC. Disabling windows automatic update is crucial for a seamless gaming experience.
- To disable automatic windows update, open the windows run command by pressing the Windows + R button.
- In the search bar that appears type services.msc and hit the enter key
- The new window that will open will contain a plethora of different options. Navigate to the option that says Windows Update and left-click on it.
- In the new window head over to the general tab which will contain the startup type option.
- From the dropdown menu select disable for this option.
- Hit apply and restart your PC.
Upon successfully doing this windows will no longer automatically update.
RELATED:
Best Gaming PCs Under $2000
6: Turn Off enhanced Pointer Precision
Enhanced pointer precision is a Windows version of mouse acceleration tool and if you are into shooting games you will know that acceleration is a no-go. From the start, this option is enabled in Windows so disabling it is important if you want to play precise aiming games. To disable the windows enhanced pointer precision do the following
- Open the control panel.
- Head over to the device section and click on the mouse
- A new window will appear and here navigate to the pointer option tab
- Uncheck the enhanced pointer precision option.
- While we are at also make sure that the select pointer speed toggle is on the sixth option.
Disabling enhanced pointer precision will remove any acceleration from your mouse movement and restore the raw input of the mouse sensor.
7: Check if you are Ruining the Correct Refresh Rate
While this may sound like a no-brainer you have to realize that there are people out there who buy high refresh rate monitors only to play at 60hz due to the failure of windows to optimize the display. To check your refresh rate, head over the Windows setting by pressing the Windows + I and do the following.
- In the Windows setting menu head over to the setting option and open it.
- In the System menu, navigate to the display option and click on it.
- A new window will appear, here click on the advance display setting option.
- Next switch the tab to one named Monitor and here choose the maximum refresh rate your display supports. For example, if you are on a 144hz monitor then choose the 144hz refresh rate rather than the default 60hz.
RELATED:
Best Gaming PCs Under $1000
8: Disable Windows 10 Notifications
Don’t we all hate when we are bombarded with notifications when playing games? Well, the haphazard windows notification manager does not help either in this regard to therefore it is better to turn off the notifications completely.
- Open the settings menu by pressing the Window + I button.
- When opened click on the System tab.
- In the system tab head over to the focus assist option.
- Here you can either select the off option or put the notification of Alarm only mode if you are using that feature of Windows.
Trust me playing games without any disturbance allows for a much superior gaming experience than rather having your game minimize due to a stupid notification which is not required.
9: Tweak In-game graphics
I know it does not sound fancy but look at it this way. If by downscaling the graphic settings a bit of the game, it runs much smoother with a higher frame rate then there is nothing wrong with that. The sacrifice of graphics quality for a better gaming experience is well worth it.
- To tweak the graphics of any game head over to the game options.
- Here go to display and graphic settings. Adjust each option according to your preference and exit the setting menu
Please note that some games require a restart after changing the setting so keep that in mind. Do not change the graphic settings before saving the progress of the game.
10: Clean and Defrag Hard Drive
Cleaning the hardware is of immense importance in the grand scheme of things especially if you are using a single hard drive for games and Windows 10. An unclean hard drive leads to slowing down of the PC and therefore will affect any game you play. Defragmentation of hard drives increases the health and the longevity of the drive and is therefore beneficial for the PC in the long run. To disable the hard drive to the following
- Press Windows + I to open the setting menu of the PC.
- Click on System and then proceed to open the storage tab.
- Here you will be presented with the hard drive and beneath it head over to the temporary files option.
- Check the files you want to delete and click on the Remove file button
Doing this will take away some of the junk bogging down your PC and decreasing its performance. Some storage space will also be freed up depending on how many files you delete. This space can be used to store more games or other useful applications.
To defragment the hard drive, do the following
- Follow the exact procedure as above till the second step and head over to the storage tab.
- Once reached here, click on the show more storage option.
- In the subsequent tab that will open you will see an option labeled optimize drives click on it.
- A new window will appear, here select your hard drive and click on the optimize button.
- Let the process run and when it completes to 100% your drive is successfully defragmented.
11. Disable Accessibility key Combinations
If when gaming, you have experienced the game minimize when pressing the shift key continuously it’s because of the access key combination. This is rather annoying especially if you play competitive FPS games which require you to press the Shift key continuously. To disable the accessibility key combinations, do the below steps
- Open the windows setting menu by pressing the Windows + I key.
- Click on the ease of access option and head over to the keyboard next which is present in the left sidebar panel.
- A new window will appear. Uncheck the first two options under the make it easier type heading.
- You are done now exit the settings.
Unchecking these two will no longer put annoying warning pop-ups on your screen and hence you can enjoy playing your game without any disturbance or inconvenience.
12: Update GPU drivers
Whenever a new game releases it may not be optimized for your graphics card. More often than not if this is the case Nvidia or AMD will release updated drivers to solve the problem. Updates may also contain newer features for the graphics card. Therefore, it is important to keep the drivers of your GPU updated. To update the drivers of your graphics card, head over to the software of your respective manufacturer i.e GeForce Experience in the case of Nvidia and Radeon Adrenaline Software in case of AMD.
For an Nvidia graphics card do the following
- Open the Geforce Experience software. If you are opening the software for the first time it will require you to register with Nvidia. The account-making process is fairly standard here.
- When logged into the software, click on the drivers tab which is present on the top of the screen.
- Click on the check for the update option. The software will present you with the latest driver for your card. Hit the download button and wait for the download to complete.
- Once the download completes, click on express installation. The drivers will now start installing and your PC might reboot in the installation process.
For an AMD graphics card do the following
- Open the Radeon software.
- Click on the home tab.
- To the top right of the screen, you will see the software information. Click on check for updates.
- If presented with an update, click on install and let the software do its thing.
- The software will take a while and once it finishes the process your drivers will be updated.
13: Tweak GPU Settings
Tweaking the GPU settings inside the perspective software of either Nvidia or AMD is another way in which you can further optimize gaming on Windows 10. The tweaks I would recommend are as follows:
For Nvidia
- In the windows search bar type Nvidia control panel and hit enter.
- Once in the application click on the Manage 3D Settings option found in the left-hand side menu bar.
- Here we have to go a total of 3 tweaks. For the first one navigate to the maximum prerendered frames option and the value to 1.
- Scroll down further and next, you will find the threaded optimization option. Set this to On.
- Lastly, work your way to the VSync option and disable it.
These changes will allow better breathing space for your hardware. Not only the performance of the PC will increase hence leading to more frame rate in games, but games will also run smoother due to disabling VSync.
For AMD
- Open the AMD Radeon software and click on the gaming tab found at the bottom of the app screen.
- Click on global settings.
- Turn off Anisotropic filtering, surface format optimization, wait for vertical refresh and anti-aliasing mode and method respectively.
- While adjust texture filtering according to your hardware and need.
These simple tweaks take just a minute or two to complete and can increase the performance and optimization of your PC so give it a shot.
14: Disable Nagle’s Algorithm
Although this term seems fancy and all on the surface it is used for a simple concept. Nagle’s algorithm is used to improve internet connecting the limiting the number of packets sent to the network.
The packets here basically represent the flow of data to the network. While limiting these packets can be beneficial for users with slow internet connections but these days when most of the households have upwards of 100Mbps internet speed it is no longer required.
Since it is no longer required all it does is add extra latency to your network and if you are into online games you would know that having the least amount of latency is crucial for a good gaming experience. Hence, all the folks with decent internet connections should have this disabled by doing the following
- In the PowerShell type ipconfig. Make sure to type ipconfig exactly as done here.
- Hit enter key. Let the sequence run and once finished, copy the IPV4 address of your computer.
- Next up we need to open the windows registry and to do in the search bar type Regedit.
- Click on the desktop app named Registry Editor and open it.
- When opened the registry application will contain many folders navigate the registry folder in this order. Open Hkey_local_machine/system/currentcontrolset/services/Tcpip/parameters/interface in that order respectively.
- On the newly opened window on the right side of the screen search for DhcpIPAdress. The value of the DhcpIPAdress should match the one we copied from Windows PowerShell.
- Staying on the same window right-click and create a new DWORD 32bit. Rename it to TcpAckFrequency and set the value to 1. Repeat the same process for the second entry but rename this TCPNoDelay with the same value of 1.
- After doing all this you have finally disabled Nagle’s algorithm. For these changes to take effect restart your PC.
15: Overclock Graphics Card
Overclocking is tapping into the extra potential of the graphics card for free. You see when a graphics card is rolled out by a manufacturer, they do not unleash the maximum performance of the card.
Overclocking refers to the manual increase of the core clock and the memory clock of the graphics card. If you are wondering if it is safe or not, then do not worry as it is safe and is done regularly by seasoned PC gamers. Since we are overclocking as an amateur let’s only go with basic overclocking. To overclock the graphics card, download MSI afterburner. When installed open the program and get ready for increased performance.
Let’s go over the basics of the after MSI burner first before we tweak anything. On the top, you will see 4 readouts for GPU clock, Memory clock, voltage, and temperature. The center panel contains two sliders one for the core clock and another for the memory clock. We will use these sliders for overclocking.
On the right of this, you have the fan settings and on the far left, you have a voltage slider. For overclocking, right of the bat increase the power limit to the max. This will allow the card to draw more voltage. Then increase the core clock in +10 increments and memory clock in +5 increments. After each increase, run a benchmark for 5 minutes to see if the GPU is stable.
Keep on increasing the core clock and memory clock until the PC is stable. When it crashes revert to the last used values. Congratulations you have successfully overclocked your graphics card and now can enjoy the increased performance for free.
16: Upgrade Hard Drive to an SSD
If you are experiencing slow down and stuttering in OS and as well in games, then more often than not your hard drive is causing this issue. This sort of slowdown is especially common in old PCs with worn-out hard drives.
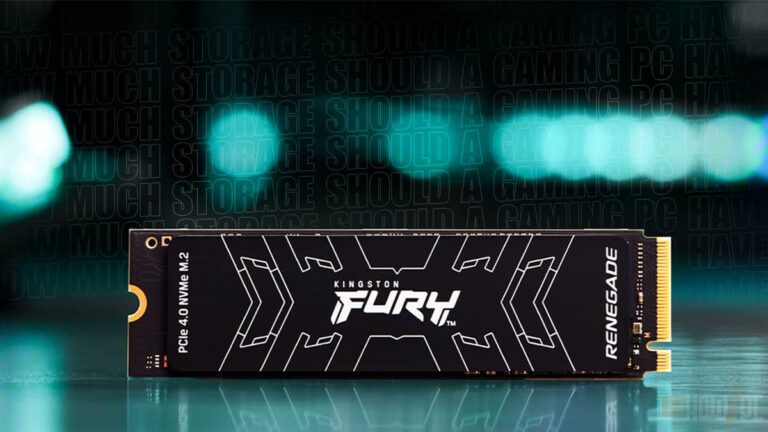
To remedy this situation, get an SSD. SSD is the latest storage standard, and these drives are much faster than traditional Hard disks. An SSD will not only make the OS snappy to navigate around but also decrease the load times of the games. One particular game that comes to mind is GTA Online which greatly benefits from an SSD.
RELATED:
10 Best Gaming Chairs for Under $200
Conclusion
These were some tricks and tips that we thought were worth mentioning. The effectiveness of these changes is dependent on the hardware but one thing is for sure that they do help to optimize windows 10 for gaming.

