Recording gameplay on PC has surged in popularity to become one of the key essentials when it comes to gaming. Countless gamers around the globe use this feature to showcase their feisty or meticulous gameplay while others do it share a cool and funny moment with their friends.
The rise in popularity of content creation and Twitch streaming is no more only about sharing those moments but now people record their gameplay for a living. Due to the demand for gameplay recording today there are many recorders in the market that each offer something unique and interesting.
When it came down to me picking the best ways in which you can record your gameplay and share it with the world I went for the classic choices. My goal was to choose something for the gamers that do not require any subscription to get into and is easy to pick up and understand.
Hence in this article, I am going to shed light on the 4 ways I think in which you should start your recording journey. So, without further ado let’s get on with the recorders and the methods shall we.
Record Gameplay through the Xbox Game Bar
After ecstatic demand from the consumers, Microsoft finally added a built-in gameplay recording feature into Windows 10. They added a whole slew of Xbox-derived content into the Windows platform and the screen recorder was one of them. Case in point the Xbox Game Bar, through this application
We are fortunate enough that now everything is just handed to us on a platter in terms of recording because before the built-in Windows recorder people had to download loads of 3rd party applications to record their gameplay.
That was not only costly but also required a lot of time to setup up properly on a given PC. That however is a thing of the past now so let’s just leave it behind and focus on the feature currently in hand. Follow the below-mentioned steps to record high-quality game footage through the Windows 10 built-in recorder.
- Open the Xbox Game Bar by pressing the Windows + G key.
- A pop-up screen will appear with a collection of different icons.
- For our use, click on the capture icon that is situated next to the sound icon.
- Upon doing this another screen will pop up. Click on the third icon from the left.
- When done correctly a timer on the top right of your screen will start which indicates that the recording has successfully started.
- To end any recording click on the red pause button that is displayed next to the timer.
If you are unable to record or if the game bar window does not pop up when you press the Windows + G key, then most likely it is disabled in the settings. To ensure that head over to the game bar setting by typing game bar in the Windows search bar. When in the settings menu uncheck the option that says disable screen recording.
As you have seen from the demonstration above recording gameplay using the windows screen capture feature is very easy. You can quite literally get up and running with your capture within minutes. To shave the time further you can press the Windows + Alt + R keys together to start recording instantly. This shortcut is really helpful in games when you want to capture a specific moment.
When you are done with a recording the file automatically saves. You can access this file by going to the Video folder on your gaming PC. All files are stored in the mp4 format and images in the PNG format. The Xbox game bar is easy to use and configure but it does not provide the best quality recording. For a bump up in quality refer to the next method.
You May Also Like:
500 Dollars Gaming PC
Record Gameplay through the Graphics Card
The screen recording and clipping feature are also available on both AMD and Nvidia graphic cards. Both the companies have heavily invested to improve the quality of their game capture tool and hence we are at a point where recording through both the AMD Radeon software or Nvidia GeForce experience produces good quality videos.
To record via the graphics card, open the software of the respective manufacturer. Radeon software in case of AMD and GeForce Experience in case of Nvidia. If you don’t have the software, you can install it through your manufacturer’s respective website. To do this, you will also have to determine which graphics card you are using which can the done through the system specifications information.
Once everything is set up and ready follow the steps below to record gameplay via the graphics card:
For an Nvidia Graphics Card
Recording gameplay on an Nvidia Card is easy
- Run the game you want to record
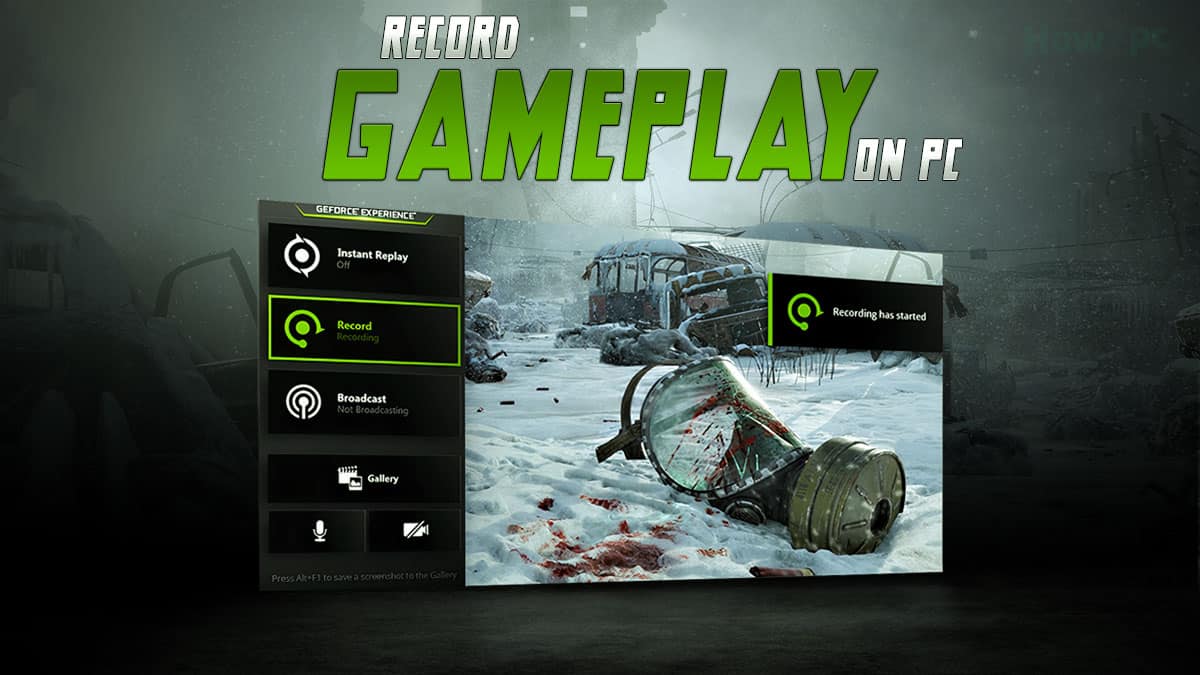
- When in-game press the Alt + Z key to bring up the GeForce Experience overlay.
- In the overlay, navigate to the record option and click on it.
- Subsequently, your recording should start.
- To end the recording click again on the record button
Once a recording is stopped the Nvidia GeForce Experience automatically saves the file the latest file. You can preview the file in the GeForce Experience itself or the video folder of your PC under the Nvidia section.
For an AMD graphics Card
If you are using an AMD graphics card, then do not worry as the process here is also as simple as Nvidia. Begin the process by
- Run the game you want to record the gameplay off.
- Press the Alt + R key to open the Radeon software
- In the software window, click on the Record & Streamtab.
- In the subsequent window that will open you will find a lot of various options and a screen preview.
- If you do not want to adjust anything and record on the default setting, then click on the start recording option.
- This will start the gameplay recording.
As you see from the process AMD has drastically improved its software. It is now simple and has a good user interface which is significantly improved from the clunky UI on the previous. Upon completing your first initial recording for the next you can directly use the shortcut key. To start recording via the shortcut press CTRL + SHIFT + R key.
If you are not content with this combination AMD allows you to customize this aspect in the software. You can use whatever combination you prefer as long as it is not used for any other command already.
The Radeon software also automatically saves the file upon stopping the recording. To preview the file you can either navigate to the Video folder of the system or you can directly preview your content via the Radeon software.
You May Also Like:
Best Prebuilt Gaming PC Under 1500
Record Gameplay Through Bandicam
Bandicam is a 3rd party software that you can utilize to record gameplay on PC. This software was made very popular in the early days when the Xbox game bar was not around but the popularity of this software still holds water today as many gamers rave by the effectiveness of the software.
After examining various software Bandicam made the cut on this list of gameplay recorders because it is easy to use and manage. The software has a good user interface, and everything is hassle-free. Though one issue I see users experiencing with this software is that it does not allow for the greatest customization though given that it is running on an old source code this is to be expected.
The greatest advantage of using Bandicam over the other 3rd party recording software is that this one is free to download for any user. If this software piques your curiosity and you want to start your recording journey through this software then follow the steps below.
- Head over the web and download the latest version of the Bandicam software from the official website.
- Once downloaded open the package installed and follow the procedure on the screen to finish the install.
- Open the Bandicam software and go through the first-time user instructions.
- Once you have reached the home page, open the game you want to run.
- Leave the game running in the background and return to the Bandicam window.
- On top of the Bandicam window, you will find a controller/game icon click on it.
- After doing this, Bandicam will recognize the game that is running in the background and its name will appear in the Bandicam window.
- Configure a record/stop shortcut key or else you can directly click the REC button in the Bandicam window.
- This will successfully start the recording.
With the free version of the Bandicam software, the recording time is limited to 12 minutes. Though you can bypass this by repeatedly started recording over again with the time expires. This version also carries a watermark. If this is too much of a bother to you then you can buy the full version but only do that if you like Bandicam recording software and want to use it for your future recordings.
Recording Gameplay on a PC through OBS
OBS is the most comprehensive recording software you can utilize for your gameplay. The open nature of OBS also makes it vastly customizable and configurable. This program is much more than just a recorder when you think of it, and it can help you in the future as well with other capture-related stuff.
The best thing about OBS is that the software also lets you record an external source as well granted you are using a capture for the aforementioned source. This versatility is the reason most professional content creators use and recommend OBS for recording.
The only drawback of this software is that the barrier to entry is quite high, and the user interface is intimidating. While the customization OBS allows is great for any professional content creator but for a gamer who is just looking to record his gameplay, it can get overwhelming.
If you can live with these issues, then OBS is just the software you need to begin your recording journey. To set up OBS for recording gameplay firstly download and install the software. Once this is done, proceed with the following.
Without a Capture Card
If the game is already running on the PC, you want to record gameplay at then do the following:
- Open the OBS software and search for the box named Scenes. This will be positioned in the bottom left corner of the software.
- In the scenes, tab click on the + button.
- A new message will pop up, in which you have to name the scene you want to create. Just use a recognizable name here so when you log back into the software you remember the name.
- Next, navigate to the Sources tab that is found next to the Scenes box.
- Here click on the + button as well. Once you do this, select the Game Capture option from the ones that are displayed to you.
- By doing this, a properties box will appear. Up next click on mode and select either Capture Specific Window or Capture Any Fullscreen Application. If only the game is to be recorded, then select Capture Specific Window option.
- After choosing the Capture Specific Window option another dropdown menu will appear.
- At this point open the game you want to record. Once the game is opened return to the OBS applications and the name of the game should appear in the new drop-down menu.
- We are therefore done with the setting. Hit ok and save your settings to be used later on.
- Now the game should appear in the OBS window.
- If it does click on the Start Recording button that is found on the bottom right of the screen.
- You can click it again to stop the recording at any time.
The process that involves gameplay recording is not easy to set up on OBS. This is the reason many new gamers shy away from using the software but once you get a hang of things, this tedious task will feel more like a chore that you have to do for recording gameplay with the best quality.
If you are willing to experiment in the content creation industry, then OBS can also help to kickstart your journey in the most professional way. It has a handful of tools that you can use to not only upload videos but also stream on platforms like Twitch and YouTube.
This was how you can record gameplay with OBS if the source of the capture is the same but what about if we want to record gameplay from an external source. I mean there are other gamers besides PC as well so what about the folks at consoles. Well, if you belong in that camp then do not worry as the next section is dedicated to you.
With a Capture Card
Gameplay recording does not merely extend to the same source recording. Most professional gamers use different setups for gaming and recording. Taking aspirations from the popular professionals out there many mainstream gamers wowing for a career in streaming and content creation are also incorporating multiple different PCs in their setup.
The use of external source recording extends far beyond that though. This is the primary way in which console gamers can record their gameplay on PC. For console gamers recording on a PC with OBS delivers far superior video quality than the built-in recorder for the Xbox, PS, or Nintendo.
Hopping straight into this idea is not that easy though as for external recording you will need a capture card. If you are committed to this though I would recommend getting the Elgato HD 60S. This capture card is the most popular in the industry and is used by the big names in the content creation world.
Unlike other capture cards, this deserves the hype because it consistently delivers excellent video quality. Elgato HD 60 Pro is a one-stop solution for all your capture needs as it has multi-platform support.
While we are at it do yourself a favor and buy a good quality HDMI cable because we will need it when connecting the capture card to the PC. Now that everything is in order let’s see how we can connect the capture card to a PC.
Related:
Best Gaming PCs
How to use Capture Card on a PC?
Before we get to use our Elgato HD60 Pro we first have to install it. For installing the capture card, we have to understand the nature of the card. The Elgato HD 60 Pro is a PCI-E card and hence needs to be installed on the motherboard.
The PCI-E slot where this capture card needs to be installed is generally located in the lower section of the motherboard. If you have a graphics card installed in your PC then install the capture card in the slot that is below the graphics card otherwise the slot will look something like the one you see for the RAM.
Correctly align the pins of the capture card to the notch cutout in the slot. When aligned push the card in until you hear the latch catch the card. Once done that is done fasten the thumbscrew to keep the card firmly in place.
Once the card is installed the other process needs to take place in Windows so power on your PC and let’s get going with the following
- Download the Elgato HD 60 Pro drivers from the manufacturer’s website and install them
- Download the latest version of OBS studio.
- Open the OBS software and navigate to the sources plane.
- Click on the + button and choose video capture device.
- In the dialog box that appears, name the source to HD 60 Pro and click ok.
- After clicking on the ok button, a new pop window will appear. Here in the device drop-down menu choose the option Elgato Game Capture HD and hit ok.
- The capture card hence will successfully be added in the source plane.
- We are nearly finished and all that needs to be done now is to configure the settings. To do this right-click on the name of the capture card and click on properties.
- In the new window that opens click on configure Video option.
- This will present you with the capture settings. You can alter the settings here to get the video output you desire.
- When configured click on done.
- The capture card is now all set up. Fire up a game for a test run and see the amazing results for yourself.
Recording gameplay on PC with a capture card is not that tedious as it sounds. When the right equipment is in place the procedure becomes quite easy. Also do not forget that if you do end up going the capture card route the result will be very rewarding.
Conclusion
With the end to the capture card segment, our article also comes to a rest. We have thoroughly explained four ways in which you can record gameplay on PC. All these methods are good in their own right, but you cannot help but point out the fact that the more upfront hassle you are going to go through the more rewarding your video quality will be. their own right, but you cannot help but point out the fact that the more upfront hassle you are going to go through the more rewarding your video quality will be.
This is the reason our list is in descending order when it comes to ease of use but the deeper you get the more rewarding the process is. Your focus should be on choosing the one that can at the end of the day get the job done for you.