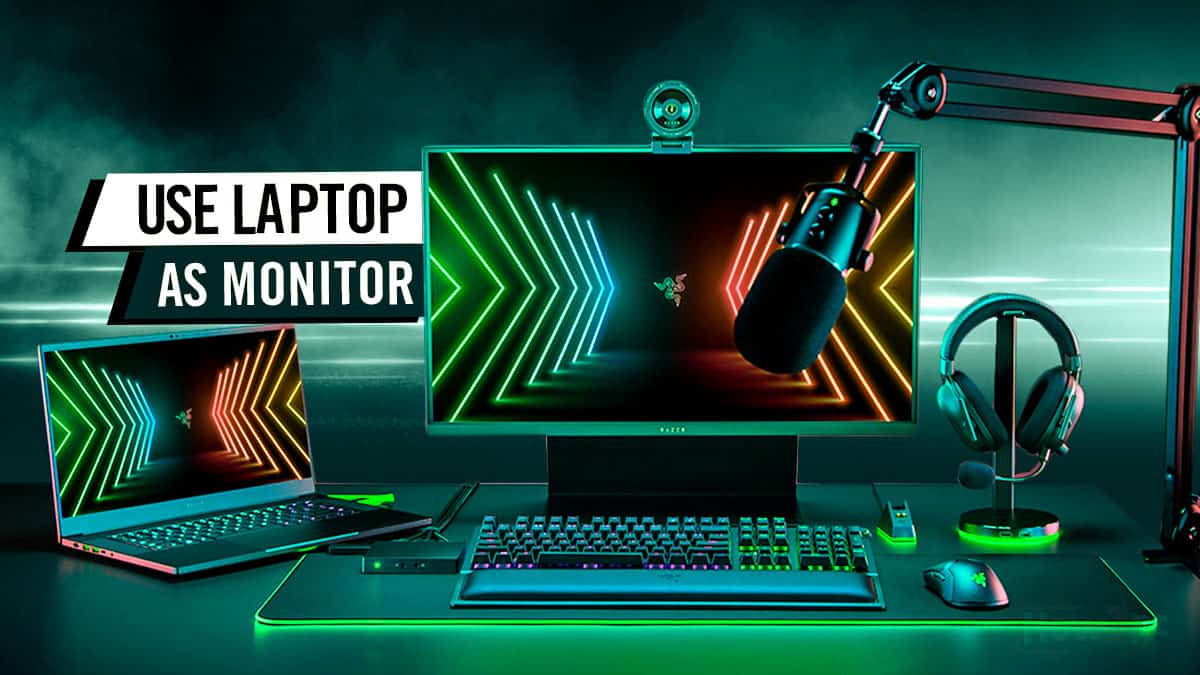
More screen real estate equals more productivity. I am sure you have heard that one before but how do I expand my screen size without buying an expensive second monitor you ask?
Well, just use your laptop as a monitor.
I have left you wondering, haven’t I? Don’t scramble I am going to tell you if you can really use your laptop as a monitor.
Yes, in a nutshell, you can use a laptop as a monitor granted you have the right setup for it. The setup itself does not need to be fancy either. By using the built-in Windows Miracast feature you can get your laptop connected as a monitor wirelessly within minutes.
Many of you might have not have thought about this but I guarantee you using the laptop as a secondary monitor is not a gimmick but rather a very effective way to increase productivity.
Do not get ahead of yourself yet as in this article I am going to provide a comprehensive guide on how you can use your Windows laptop for this purpose.
By the end of this article, you’re going to learn:
- How to use your laptop as a secondary monitor
- How to mirror your primary screen on the laptop
- How to use your laptop as a monitor screen when remotely connected to a PC
- How to use laptop as a monitor for a PC for which you don’t have a primary display/monitor
Excited, well you will be after I tell you about the benefits of using your laptop as a monitor.
What Benefits Do I Gain From This?
Naturally, the first question that you should have asked yourself is whether going through this process is worth it. Why don’t we get a clear perspective of that?
With using your laptop as a monitor, you have a lot to gain and none to lose. This method is also great for reviewing a laptop that may otherwise be slow and not useable on daily basis.
The beauty however of this setup is that it is portable. You can reverse the setup at your own will and within seconds when you want to take your laptop out with you.
So, there is no reason why you should not try this setup given the advantages it has to offer.
By having two displays at once you can take advantage of the following things:
- Have web pages open on your primary display while you compile information on the laptop screen.
- Have two documents open side by side for a thorough comparison.
- Actively monitor data on one screen while you perform actions on the other.
- Play a video game on one screen while watching a tutorial related to the same game on the other
- Dedicate a single display for replying to social media messages while you work on the other.
These are some of the simultaneous tasks you can pull off with using your laptop as a second monitor alongside your main display.
Benefits of the using laptop as a monitor are however not limited to secondary screen use. By using the laptop as a monitor, you can revive a slow laptop or a PC with no primary monitor.
If your PC is just sitting on a shelf and collecting dust because you lack a monitor for it then no worries just your laptop as a monitor for your PC.
Benefits aside I reckon using the laptop as a monitor is a perfect fit for students. Students will get to take advantage of the powerful lab PCs by using the laptop as a monitor for that PC especially engineering students.
In this way, they will be able to complete heavy and demanding tasks like using CAD software or 3D modeling with the comfort of their own laptop.
How to Use a Laptop as a Second Monitor?
The following are the three ways in which you can use your laptop as a monitor
- Extend screen
- Duplicate screen
- Only secondary screen
It is important to understand the difference between these three because they differ vastly in their functionality and are useful for completely different tasks.
- The extended screen option is when you use your laptop screen as an extension of the monitor screen. In this way, you are basically extending your primary display. This is the method in which you can use your laptop screen and the primary monitor screen independently for different tasks.
- A duplicate screen is mirroring your main screen on the laptop. Your primary display is now being cast on your laptop screen. Whatever the primary display shows the laptop screen will follow.
- The third way however is completely different from the other two. With the only secondary screen option, your primary screen goes blank, and the laptop display now becomes your only display.
This is the primary difference between the three. For choosing one or the other It all boils down to what you want to do with your laptop’s display.
- If you want to multitask with a different program on the laptop screen and the main screen, then go with the Extended screen option.
- On the contrary, if you only want to showcase the information that is on the main screen to your laptop screen exactly as it is then go with the secondary screen option.
- While if you want to altogether cut down the primary display and only want to use your laptop’s screen then choose the only secondary display option.
Do Laptop Cooling Pads Work?
Method 1: Using Windows Miracast to Use the Laptop as a Second Monitor
People have been asking for it, raving about it and Microsoft finally gave them what they wanted in the form of Miracast on Windows 10.
The process for using windows Miracast is quite simple and easy. But it is not perfect, no application is. The incompatibility issues also haunt Miracast but at the end of the day, it does provide a seamless wireless connection for your laptop to be used as a secondary display.
Prerequisites for This Method
Before you go diving headfirst into this method there are prerequisites which you should take to relieve yourself from any problem that comes later on.
Connect both laptop and PC via Wi-Fi: For this process to work you need to make sure that your laptop and PC are connected to the same router via Wi-Fi. The last bit is important your PC needs to be connected with Wi-Fi and not with an ethernet cable.
Many people miss this simple prerequisite and end up having a really bad time when they are executing the steps for this method. You don’t want to be that guy do you now?
If your PC does not natively support Wi-Fi, then get yourself a cheap Wi-Fi dongle for a couple of bucks or an expensive one if you fancy one.
An updated version of Windows 10: Although this is not as crucial as having both machines connected via Wi-Fi but still can cause issues. Ideally, before establishing a connection, you want to update Windows 10 on both your PC and laptop which are to be used as primary display and secondary display respectively.
How to Setup Everything With This Method
This process of establishing a secondary screen connection via the Miracast involves running through steps on both the laptop which is to be used as the secondary display and the PC screen which is to be used as the primary one.
Steps to be done on the laptop which is to be used as the Secondary Display
- Navigate to the Windows search bar found on the bottom left of your screen and type projection settings and press Enter key.
- A new page will open. Set the first dropdown to available everywhere. You do not need to change anything else.
This is it for the laptop side of things now let’s dive into the PC part.
Steps to be done on the PC which is to be used as the Primary Display
- Navigate to the notification center by clicking on the speech box icon found next to the Network icon.
- Click on the Connect option.
- Upon doing this the Pc will start looking for available devices. When the name of your laptop pops up, select it.
- Now head back to your laptop screen to accept the incoming connectivity request.
- Once the request is accepted your PC and the laptop are successfully connected.
From here on out we need to do fiddle with some settings to get the desired result we want from our laptop’s display.
- Exit the existing window on your PC screen to head back to the desktop.
- Right-click anywhere on the desktop and from the drop-down select the display settings option.
Now, this is where I need your attention the next couple of steps will decide on how we want our laptop screen to behave.
- Once in the display settings page under the Multiple Displays section, you will see
multiple options.
Extend laptop’s display to use as a secondary monitor
- To use your laptop screen as an extension of the primary display select the extend option.
Using a laptop screen as a Mirror of your Primary display
- To mirror your primary display on the laptop screen, select the duplicate option.
Only Use Laptop’s screen without the primary display
- If you want to use your laptop screen only then select the secondary display only option.
- Furthermore, you can rearrange the display according to your liking. Once everything is set exit the settings menu.
You have now successfully completed the process and can finally use your laptop as a monitor.
Therefore, you can also now flex on your friends and subordinates about how poor their productivity setups are. Nah just kidding, don’t do that but rather enjoy your extra screen estate and make use of it in clever ways.
Method 2: Using Spacedesk Application
Don’t fancy using the built-in Windows Miracast feature I don’t blame you. Sometimes the program can really act up and annoy users who are looking for an easy and seamless connection.
Luckily for you, there are plenty of other free applications that will fulfill your exact purpose as well. Don’t get me wrong most 3rd party applications are great but the one we have picked out for you is Spacedesk.
This tried and tested application has been on the market for a while and has received great critical reviews. It is easy to use and has an intuitive process for pairing the laptop screen to your primary one for use as a secondary monitor.
I am not going to sit around and babble here about the Spacedesk but rather allow you to decide for yourself about how good the application is.
Prerequisite for This Method
This method also carries the same prerequisite as the one mentioned in the Windows Miracast method that being,
- Make sure the Laptop and the PC are connected to the same Wi-Fi network
Unless the PC and the laptop are connected on the same Wi-Fi connection the process won’t work.
How to Setup Everything With This Method
Enough with the babbling let’s get to steps now, shall we? The following are the steps for this method
- Download and install the Spacedesk application on your PC that we will be using for the primary display and on the laptop that we will be using for the secondary display.
- If during the install process you get prompted with add exception to firewall message. Select and tick-mark that box.
- Once installed navigate to the windows search bar and type spacedesk SERVER and press the Enter key to open the application on both the laptop and the PC.
- Now head over to your laptop’s screen and in the Spacedesk program window PC under the primary display heading click on the name of your PC.
- That’s it. Now your PC screen should have synced with your laptop’s display.
Although this method may seem complex but once you download the Spacedesk application on both the laptop and the PC the rest of it is a breeze granted as long as you have the PC and the laptop connected to the same Wi-Fi network.
15 Best 144hz Monitor Under $200
How to Use Laptop as Monitor If I Don’t Have a Primary Display?
Let’s say you don’t have a primary display on you whatever the reason may be and want to use your PC with the being the sole monitor. Now how do you do that?
It is a fair question because the above two methods only work if you want to use your laptop as a secondary monitor along with your primary display but don’t worry you didn’t think I was going to leave you hanging with this situation, do you?
Equipment Required For This Method To Work
The nitty-gritty thing about going down an unconventional route is that you have to buy additional equipment for it.
I am not going to sugarcoat even after you get the proper equipment the process is not as easy as just downloading an application and connecting to a second screen wirelessly.
Anyway, you will need the following gear for this process to work:
Long story short the HDMI port on your laptop will only accept a video out signal and hence any video signal coming into the laptop will not be accepted.
This is where an HDMI Capture card comes into play. We have already talked comprehensively about HDMI capture cards in this article so check it out for further detail.
The gist of it is you will need to buy an HDMI capture card. Now it is up to you whether you want to buy a fancy one like the Elgato HD 60S Pro or stick to a more budget one.
Older PCs without a dedicated graphics card have a VGA port rather than an HDMI one. On the contrary, most laptops have HDMI ports but lack VGA.
Therefore, a converter may come in handy if that is the case for you. Otherwise, if your PC has an HDMI port then you are good to go.
This is self-explanatory. HDMI cable will be used to form a connection between the laptop and the PC.
That wraps it up for the equipment we will need now let’s head to the steps.
How to Setup Everything With This Method
- Shut down your laptop
- Connect your HDMI capture card with your laptop by using the USB port.
- Plug one end of the HDMI cable into the HDMI port of the capture card and another end into the HDMI port of the PC.
- Turn on the PC.
- Subsequently, the screen of your laptop will start acting as the monitor of the PC.
As you can see with the right equipment compiling the setup together is rather easy.
Conclusion
This brings up to an end. In the article, we tried to cover all the methods to use your laptop as a monitor. We hope that you found the information we provided in our article useful and our step-by-step guide easy to follow.
Do let us know in the comment section if you were able to successfully perform any method. If you succeed by doing another method not on the list, then put it down in the comment section it would be greatly appreciated by everyone.