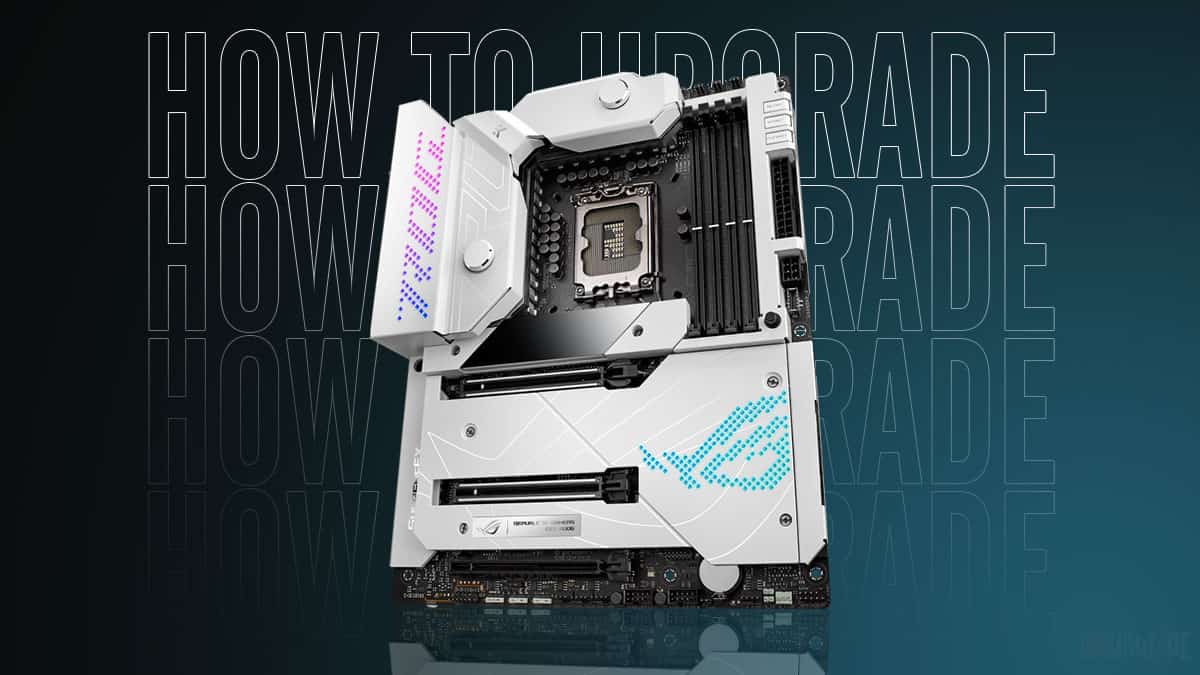
So, you are looking to upgrade your motherboard but are held back by the complexity of the task. Don’t worry; you have come to the right place. In this article, I will tell you everything you need to know about upgrading your motherboard.
This article will contain a comprehensive step-by-step guide on how to upgrade a motherboard with less amount of effort. Therefore, at the end of the article, what may be a very daunting task will seem pretty easy to you.
So, without further ado, let’s begin.
Check Your Currently Used Motherboard and System Specs
Before upgrading the motherboard, it is important to know the system specifications of your computer. You don’t want to end up with a motherboard that is incompatible with your PC.
Therefore, knowing which motherboard you are currently using will also come in quite handy later. Do the following to check your system specification and the current motherboard model.
- Navigate to the Windows Start menu. The start menu is the Windows logo found at the bottom of your screen.
- In the start menu, type System Information and press the Enter key on your keyboard
- Navigate to the relevant options on the new window that opens and note them down.
- You need to know about the processor, baseboard manufacturer, and baseboard product.
- Save this information for use later on
Don’t get confused by the baseboard name because it simply refers to the motherboard. Windows uses the term baseboard instead of the motherboard, but the rest is all the same.
Reasons to Upgrade Your Motherboard
A person goes for a motherboard upgrade based on two reasons. Either there is a fault in the current motherboard you are using, or you want to add a higher-end motherboard to your PC.
Well, if you are upgrading your motherboard based on the first reason, you won’t need to change other hardware of the PC. Therefore, you can skip straight to the method for upgrading a motherboard.
That being said, if you are upgrading your motherboard because you want a higher-end motherboard, then stick around because you might need to upgrade your computer’s CPU, RAM, and Power Supply.
The next few sections will be of great use to you because, in them, I have mentioned how you can ensure compatibility between a motherboard and the various other components of the PC. This will be important when buying a new higher-end motherboard and the rest of the components.
How to Select the Right Motherboard for Your PC
You want to upgrade to a faster, more performance-capable motherboard, but there are a few things you will need to keep in mind before choosing your next motherboard.
When it comes to the motherboard, the details are behind the fine prints, so you will need to research a good motherboard. You need to consider the 5 main things: Chipset, CPU Socket, VRM, Features, Ports, and Headers.
Generally speaking, getting a bad motherboard is rare if you stick to reputable manufacturers like Asus, Gigabyte, and MSI.
If you are running an AMD Ryzen gaming PC and especially the Ryzen 5600X, then you are in luck because I have a complete article on the best motherboards for Ryzen 5600X, which you can check out.
Make Sure That Your Motherboard and CPU Are Compatible
A motherboard and your computer’s CPU are directly related to one another. Therefore, most people upgrade their CPU as well along with their motherboard.
Related: Can You Upgrade CPU Without Changing the Motherboard?
This must be done because a motherboard has a CPU socket that accepts only a particular CPU type. For example, an Asus Strix Z690 motherboard only accepts the latest 12th generation Intel processors. It is hence not compatible with older generation processors.
I have a complete article written on how motherboard functions, which you can check out to find out more about why this is the case.
People like to upgrade their CPU and motherboard together to ensure compatibility, but there is no hard and fast rule to that.
In some cases, you won’t need to upgrade your CPU because the upgraded motherboard you are looking to buy will be compatible with the previous generation CPU. This is primarily the case with AMD Ryzen processors because they are cross-compatible across different generations.
Long story short, make sure to choose the motherboard that is compatible with your CPU. Otherwise, the CPU won’t work, and you will be left with a motherboard that cannot be used.
I know this is a little difficult to comprehend, so you can refer to my article on how to ensure PC compatibility. This article will clear all your doubts if you have any.
Pro Tip: When upgrading, it is best to stick to the same generation components. Therefore, if you have an Intel 11th generation motherboard, upgrade to a motherboard within the 11th generation.
Pick the Right Size Motherboard
Motherboards come in four different form factors or sizes. Knowing which motherboard size to get is sometimes very important as your whole build may depend on it.
The four motherboard form factors are:
- E-ATX
- ATX
- Micro-ATX
- Mini-ITX
The ATX form factor is considered the standard size of motherboards. The E-ATX motherboard form factor is just a larger version of the ATX form factor. Micro-ATX motherboards occupy a nice middle ground and are neither too large nor compact. Mini-ITX motherboards are the smallest of the bunch, offer limited functionality, and are not practical.
If you ask me, the best motherboard form factor to get is ATX unless your PC build specifically requires a compact motherboard. This is because ATX motherboards offer the most functionality, are highly practical, and are easy to use.
Though choosing the motherboard form factor will not be much choice in some cases, if your PC had a Micro-ATX motherboard, you might need to upgrade to a Micro-ATX motherboard because of the size restraints.
However, this has its variances, and the size of the case plays a major role in determining whether you can upgrade to a larger size motherboard.
To identify if the current motherboard installed in your PC is a Micro-ATX motherboard, refer to its model number.
If the motherboard has the letter M at the end of the model number, then it is a Micro-ATX motherboard. If there is no letter M, it is most likely an ATX motherboard.
Regardless of the motherboard size you go with, there are plenty of options available in the market for each form factor.
Selecting the Right RAM
First, you will need to establish which RAM type your motherboard supports. The CPU socket and the chipset are the components of the motherboards that determine which RAM your motherboard will support.
Nowadays, DDR5 RAM is all the rage because it is the newer technology. DDR5 RAM is compatible with a select few sockets, and therefore there are only a handful of motherboards that carry its support at the time of this writing.
However, the adoption of DDR5 RAM is expected to take off at an incredible pace; therefore, if your PC allows, get a motherboard that supports DDR5 RAM for better future-proofing.
Besides the RAM type, there are also certain other aspects of the motherboard related to RAM. First is the motherboard RAM capacity. Every motherboard has a fixed amount of RAM that it can support.
Generally, the more DIMM slots a motherboard has, the more RAM capacity it will have. An ATX motherboard has 4 DIMM slots, while the Micro-ATX and Mini-ITX motherboard have 2 DIMM slots. Other than the RAM capacity, RAM speed is another thing to consider.
A RAM stick from the factory comes at various speeds, and motherboards also support different RAM speeds. For a DDR4 RAM, the speed varies from 2133MHz up to 4800MHz. A motherboard can have support for any x amount of RAM speed.
When upgrading a motherboard, ensure that the new motherboard supports your existing RAM speed. If it is not supported, you will need to use RAM at a lower clock speed, hence hindering the PC performance by a slight margin.
Ensure Compatible for Expansion Slots and Ports
Different motherboards have different ports and expansion slots. For gaming, you need at least one PCIe X16 slot for connecting the GPU. Keeping that in mind, all motherboards will offer at least one full-size X16 PCIe expansion slot, if not more.
Read More:
While ensuring compatibility for the GPU is not a big deal. Still, the main challenge arises in ensuring compatibility for other PC components that use expansion slots like sound cards, Video cards, network cards, etc.
Depending on your use case, ensure that the motherboard you have selected for upgrade has the right amount of expansion slots for all your PC components and not just the GPU.
Now, we come to the ports, where I have to get a little technical. A motherboard has various ports that are each tasked with its unique functionality. Some core ports are the same in all motherboards, while some ports may or may not be present in a motherboard.
To ensure compatibility with your existing PC hardware, you should be on the lookout for SATA ports, RGB LED headers, Fan headers, and M.2 slots.
Even if a motherboard has all these ports, their number could vary. For example, if your existing motherboard has 3 RGB headers and all of them are being used, make sure the next motherboard you upgrade to has three RGB headers. Otherwise, you won’t be able to power the RGB lighting of all your PC components.
By following the example mentioned above, verify the other ports I have mentioned. Make sure that their number in your next motherboard is correct.
Double-Check Your Power Supply
We often ignore the power supply when upgrading PC components, which tends to bite us later. Any variation in the PC’s power consumption can impact the power supply. Since we are upgrading an integral part of our PC, the power consumption numbers will change.
Check the power consumption of the motherboard you are buying and match it with your previous motherboard. If the difference in power consumption is minimal, you can continue using the old power supply.
However, if you plan on changing other components of the PC besides the motherboard, then chances are you will need to amp up your PC power supply. This is especially the case if you upgrade your CPU and motherboard in a bundle.
Besides matching the PC’s power consumption figures, you need to ensure some other aspects and related power supply. Bear in mind that a power supply has multiple cable connections, which all need to be compatible with your new hardware.
You especially need to pay special attention to the two connections that are the CPU power cable and the GPU power cable.
On some motherboards, you will need to use a 4+4 CPU power cable, while some motherboards, especially newer ones, require the 4+6 pin CPU cable. Depending on the motherboard you are buying, make sure the power supply has a compatible CPU power cable.
In the case of a GPU, you will need anywhere from 6 to 16 pins to power the GPU. Therefore, make sure that your power supply can cope with that demand.
Preparing Your PC for a Motherboard Swap
Now that I have told you how you can ensure that the new motherboard you are buying is compatible with the rest of your PC components, let’s replace our current motherboard with the newer one.
Replacing the motherboard is a tricky process and requires a proper preparation. It is not just a simple matter of taking the new motherboard out and fitting the newer one in. There are many other processes involved that you need to do before you finally get to pat on your back for a job well done.
The following are the preparation steps you need to follow:
Backup Your Data
Always backup your Data when indulging in computer upgrades. While replacing the motherboard won’t strip away your data. Still, you never know when anything could go wrong and wipe your entire data. Hence to avoid that, you must make a backup beforehand.
The backup can be either on the cloud or on a physical external storage drive. Going with the cloud approach is the easiest and the cheapest option, but recovering data from the cloud to your PC will take a lot of time.
While the time to recover Data won’t be as high on the physical storage drive, buying an external storage drive to back up your data is a costly approach.
Extract All the Software Registration Keys
If you are running any subscription-based software programs, it will have a key. You need to extract the keys of such programs and have them in a place where you can access them later on easily.
Writing the key number in physical form is also an alternative approach you can use for safeguarding all your software keys.
Needless, keep the keys safe because you will need them when re-using the applications after your new motherboard has successfully been installed on your PC.
Deactivate Applications
Some applications on your PC need to be activated to use. Applications like Adobe professional apps (Photoshop, premier, After effects) fall into this category. These applications might see the new motherboard as a non-compatible component.
This can cause severe problems; therefore, it is best to deactivate such applications. Like the applications, there will be some games that can fall into this category.
You should also check if your PC has any such games that are running based on activation and deactivate them before proceeding any further.
Update PC Drivers
When upgrading to a newer motherboard, you are shifting to a higher-end motherboard. This higher-end motherboard may raise some issues with your hardware. Therefore, it is best to update the PC drivers before installing the new motherboard on your PC.
More often than not, the latest drivers support newer high-end hardware, hence making your motherboard compatible with the PC. I know updating the drivers can be a tedious process, therefore I have an in-depth guide on how to update motherboard drivers which you can check out.
The Method for Removing Your Old Motherboard Out of the PC
Now that all the preparation work is done, it is time to swap out our old motherboard for the new one finally. To take out your old motherboard from the PC, we will also need to remove other PC components.
So, grab yourself a Phillips head screwdriver, motherboard’s user manual, and an anti-static wrist band to begin with the process.
- Turn off the computer and remove the wall socket
- Pull the PC out a little and remove all the wires behind the PC
- Open the PC side panel and set it to the side.
- Disconnect the cable supplying power to the motherboard. This is the largest cable connected to the motherboard and is found to the right of the CPU socket. of the motherboard and is the
- Navigate to the GPU and pull out of the cable connected to the GPU.
- Now, remove the GPU by unscrewing the thumbscrew and pulling the latch of the slot the GPU is on
- Very gently, begin by pulling at the graphics card. This should lift the GPU from its socket.
- Now, remove the RAM by pushing the two latches downwards that are holding the RAM in place.
- Move onto the wires next and remove all the front panel cables for LED, Power Button and Reset Button
- Next, disconnect the larger front panel cables, including USB 3.0, USB 2.0, and HD Audio cables.
- After removing all the front panel cables, search and locate the SATA cables and disconnect them.
- Now, remove all the remaining cables attached to the motherboard.
- Move all the removed wires to the side and tie them up, so they don’t dangle around.
- Sometimes, other PC components like the case fans can block the motherboard so remove them too.
- Locate all the screws holding the motherboard to the PC case. Remove these screws and gently lift the motherboard out of the PC case.
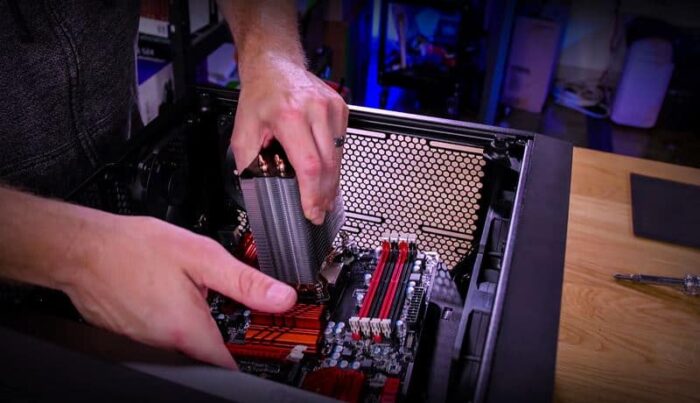
- Now, you will need to remove the CPU cooler that is placed on top of the processor. If you are using an AIO liquid cooler then perform this step before removing your motherboard from the PC case.
- Typically, for most coolers, unscrewing the four thumbscrews will detach the cooler from the motherboard.
- Flip your motherboard around, and remove the mounting bracket of the CPU cooler.
- For the CPU, unlatch the metal pin holding the CPU in place, then gently lift the CPU upwards. Don’t apply pressure nor rock the CPU back and forth.
It is important to note that you should not use any force when pulling out the cables and other components connected to the motherboard. Using force can sometimes break the delicate cables.
Also, when removing the CPU from the motherboard socket, pay special attention and ensure not to touch the pins of the CPU socket. Always hold the CPU by the edge and never yank the CPU out. Gently remove it from the socket.
The Method for Installing the New Motherboard Into the PC
After removing the motherboard, it is time to put in the new motherboard to complete the upgrade process. Putting in the new motherboard will have us do the above process in the opposite manner.
The process will be almost the same, except this time, we will attach the motherboard and other PC components to the case. Ready to begin, then use the following steps to install a new motherboard into your PC.
- Take out the new motherboard from the box and set it on an anti-static surface. That can be any wooden table or even the cardboard box the motherboard comes in.
- Open the latch holding in the CPU cover and put in your CPU. For putting in the CPU facing the proper way, make sure to align the arrow on the CPU to the arrow on the CPU socket.
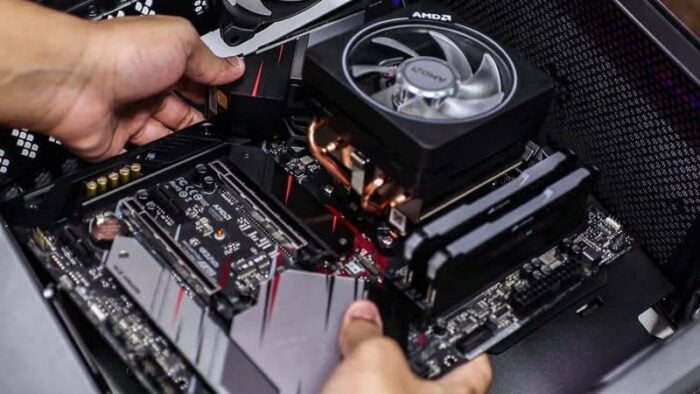
- Grab the CPU heat sink you removed from the previous motherboard, and install it on the new motherboard.
- Remember to plug the fan wire coming out of the heatsink into the motherboard.
- Push the two latches surrounding the DIMM slot. Align the notch in the RAM to the corresponding notch in the DIMM slots and place it in. Give the RAM a slight force until you hear a click sound.
- The RAM should snap into place, and this snap is an indication that RAM is installed successfully.
- Prep the PC case to place in the motherboard. Set all the cables in the case to the side and also put the side panel somewhere safe.
- Install the motherboard standoffs screws in their correct position if they are not already installed.
- Place the motherboard in the PC case.
- Give the motherboard a slight tug until you feel like it is securely held in place.
- Now, you have to install back the graphics card.
- Remove the screws of the backplate where the GPU has to be installed.
- Align the GPU correctly with the GPU slot and push it in. Subsequently, the GPU should click into place with a snap.
- Re-attach all the motherboard wires to their respective headers.
- Firstly, plug in the larger cables like the 24-pin ATX power cable, CPU power cable, and GPU power cable.
- Then install all the SATA cables and the fan cables.
- Lastly, install all the front panel headers and any remaining cables.
Related Guides
Check out some of our related motherboard buying guides.
- Best Motherboard for Ryzen 5 3600
- Best Motherboards for Gaming
- Best Motherboards for Ryzen 9 5900X
- Best Motherboards for Ryzen 7 5800X
- Best B550 Motherboard
Check out some of the other related motherboard guides.
- How to Reset Motherboard
- How to Check What Motherboard Do I Have
- How to Update Motherboard BIOS
- What Is a Motherboard
- How to Install Motherboard
- Do Motherboards Have Bluetooth?
- How to Test a Motherboard
- When to Upgrade Motherboard?
- How to Test Motherboard Without CPU?
Conclusion
With our new motherboard in, it puts this whole procedure for upgrading the motherboard of a Computer to rest. As you can already make out, upgrading the motherboard in the PC is not the easiest and requires a lot of research, planning, and execution.
If you miss any of the three stages, you won’t have a good time upgrading your motherboard, but that is why I am here, aren’t I? I hope that my article helped you upgrade your motherboard. If it did, do tell me in the comment section below.
Also, if you have any issues in any of the steps, let me know below. While you are there, why not tell you which motherboard you have upgraded to.