Want to install a motherboard inside your PC but are afraid that you might break it. A motherboard is a very delicate and sensitive PC component, but that doesn’t mean you need to be scared of installing it.
I have installed multiple motherboards on various PCs throughout my gaming PC journey. In this article, I will tell you about the most straightforward way by which you can install a motherboard inside your computer without even putting a single scratch on it.
So, toss your worries aside, and let’s get started.
The Correct Method for Installing a Motherboard in the PC
The following method I am going to show you for installing a motherboard in a PC is the most comprehensive yet the easiest to follow.
Step #1: Assemble Your Tools
A sound installation is always the result of good preparation. Therefore, like all essential things in life, having the proper prep work done is important in installing the motherboard inside the PC.
The proper prep work involves getting your hands on the correct tools that will aid you in the process and make things easy for you. These tools include:
- A Philips head screwdriver with a magnetic tip
- A pair of needle-nose pliers to retrieve screws dropped on the motherboard
- Anti-static wrist band for non-conductive installation
- A cutter or a knife to pry open the box
Step #2: Unbox Your Motherboard
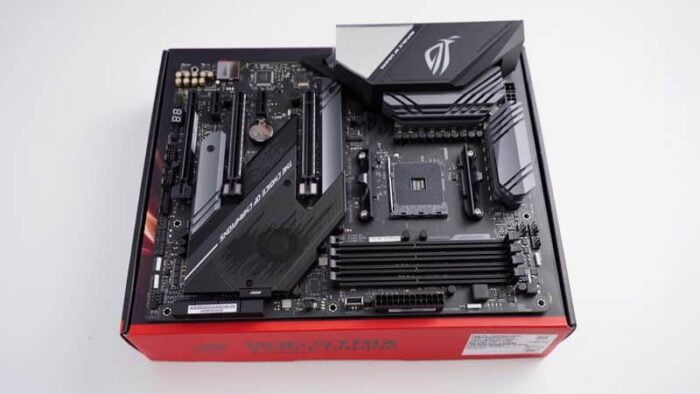
After you have all the tools needed to complete this process, it is time to unravel the motherboard from its protective box.
Inside the box, there will be a set of documents and a CD drive in some cases. Fish out the motherboard user manual document because we will need it when assembling the motherboard inside the PC.
So, put the user manual in a safe spot, get the motherboard out, and lay it on top of the motherboard box.
Step #3: Measure the I/O Shield
The I/O shield, sometimes called the backplate, is a metal plate with cutouts that resemble the shape of the rear ports of the motherboard.
Some high-end motherboards come with the I/O shield pre-installed, while for the remaining majority, you will need to install the I/O in the PC case yourself.
Before installing an I/O shield, however, you should measure it from edge to edge. Relate the measurements taken from the I/O shield to the opening of the case. They both should be the same, and if that is not the case, some adjustment is required.
Step #4: Remove the Unnecessary Bits From the I/O Shield
If the measurement of your I/O shield is not in line with the opening of the PC case, then some adjustments need to be made. Clip or trim excess metal from the I/O shield to align with the PC case.
The same goes for the shape as well. An I/O shield might have slits between a series of USB ports or other ports. It would be best if you clipped those unnecessary bits.
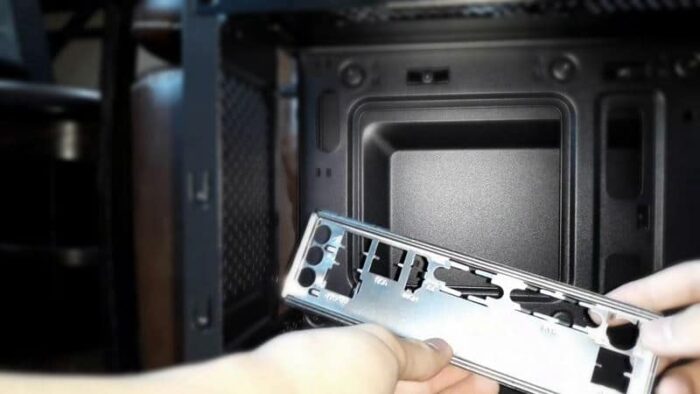
Step #5: Install the I/O Shield
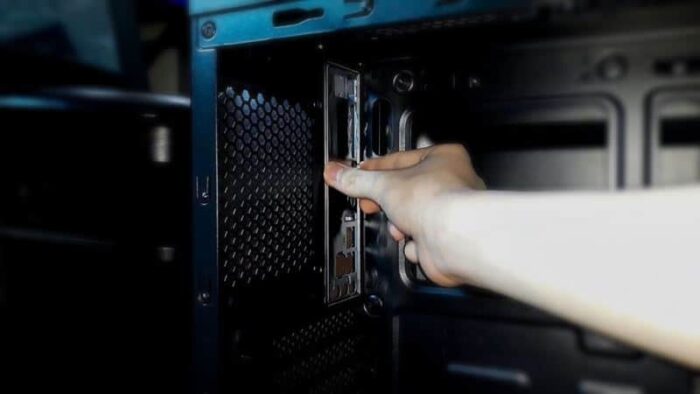
After making adjustments to your I/O shield, it is ready to go into the motherboard. Correctly align the I/O shield according to the PC case opening and push it in.
The I/O shield might have sharp corners, so don’t hold it by the edge, or you risk the chance of cutting your finger. Put your thumb and index finger on the middle section of the I/O shield and then force it in.
If it snaps into place snugly, you have correctly installed the I/O shield into the case. If your motherboard comes with a pre-attached I/O shield, feel free to skip this step.
Step #6: Connect Components That Attach to the Motherboard
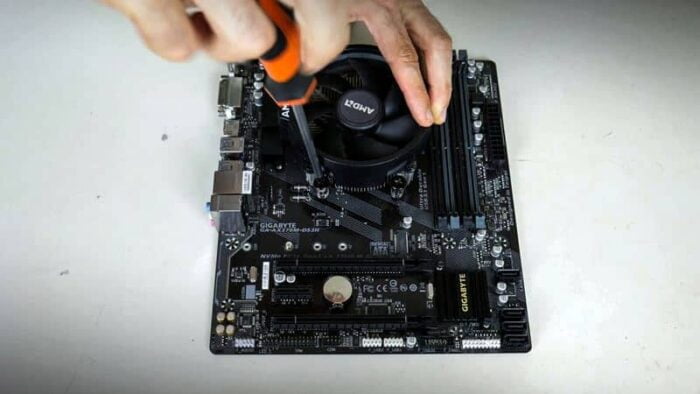
Once the I/O shield is in, it is time to install the CPU, RAM, and the CPU cooler to the motherboard before putting it into the PC case. Installing these components now is much more convenient than installing them later on.
First, we will install the CPU by unlatching the pin that holds the plastic cover of the CPU socket. Once the pin is removed, put the CPU in the CPU socket of the motherboard. To do this properly, you need to align the corner of the CPU with an arrow to the corner of the motherboard socket with an arrow pointing in the same direction.
After the CPU is in the motherboard, install the CPU cooler. Typically for installing a CPU cooler, you will first need to attach the baseplate to the motherboard’s backside and then screw in the CPU cooler on top of it.
Installing the RAM is the easiest part. Unlatch the two clips of the RAM slot and push the RAM in. Make sure to align the RAM pin to the pin of the motherboard. If you have aligned the RAM correctly, it should install into the RAM slot with an audible click sound.
If you are unsure how to install any of the PC components mentioned above, refer to my detailed guide on how to build a gaming PC.
Step #7: Examine Where the Motherboards Attached to the Case
After the I/O shield has been taken care of, our motherboard is ready to go inside the case. However, installing the motherboard inside the PC is not just putting the motherboard in the case and fastening some screws.
We will get to that step, don’t you worry, but before we do that, we must examine the part where the motherboard goes into a case.
It is quite handy to keep a marker or something that can be used to put a mark on the place where the motherboard screws align with the case.
Step #8: Install the Standoff Screws
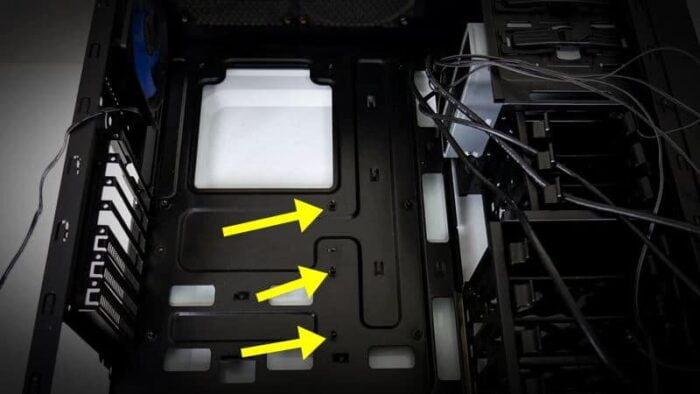
After you have put marks or have assessed where the motherboard screw holes align with the case holes, install the motherboard standoffs screws on that part of the case.
A standoff screw is basically a tall screw attached to the case so that when the motherboard is placed inside the case, it can rest a couple of centimeters higher than the case metal sheet.
Some PC cases come with pre-installed standoff screws, but you will need to install the standoffs yourself in most instances. Once you have figured out where to place them, installing them is easy.
Simply screw the motherboard standoff screw in place with your thumb, and you are done.
Step #9: Slide the Motherboard Inside the Case
Now that the motherboard standoff screws are installed, the time has come for the part you were all waiting for. Yes, next, we will install the motherboard inside the case.
To correctly align the motherboard inside the PC case without a fuss, start by aligning the motherboard ports with the I/O shield that we just installed in the previous steps.
When the ports align, gently push the motherboard in and let it slide into place. This trick should align the motherboard with the motherboard standoff screws that we just installed pretty perfectly.
If not aligned correctly, simply give the motherboard a slight nudge, which should set the motherboard right in its place.
Step #10: Screw-in the Motherboard Into the Place
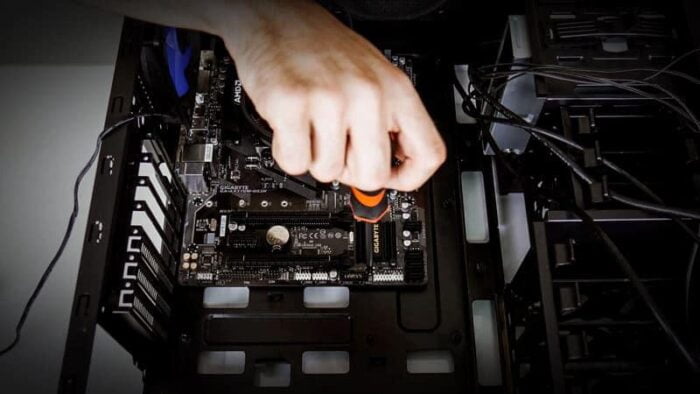
After the motherboard is inside the case, get your screwdriver and screws out. Start by fastening the center screw. Then do all the outside screws in a crisscross pattern.
For fastening the screws, you mustn’t overtighten them because that can damage the delicate PCB of the motherboard. Therefore, keep the force even and consistent across the board.
After fastening all the screws, give the motherboard a slight shake to see if it holds out in its positive state. If the motherboard is loose and wobbles around, you either have not tightened the screws properly, or the motherboard is misaligned with the case. Either way, if that’s the case, repeat steps 7 and 8 until you get a snug fit.
Step #11: Plug in the 24-Pin ATX Power Cable
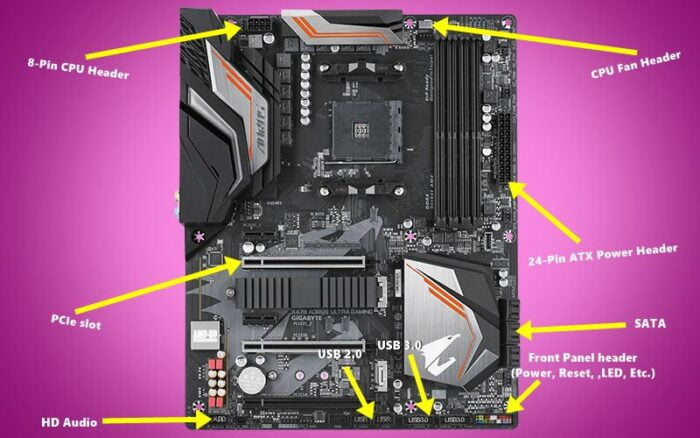
With everything connected, it is time to supply power to our motherboard. The motherboard uses a 24-pin cable for its power needs. This cable is the easiest to identify as it is the cable with the largest snout.
The 24-pin power header of the motherboard is located at the underside of the RAM slots, so this is where you will need to plug in the cable.
After the cable is set in its groove, give it a little push to ensure that it is seated correctly.
Step #12: Plug in the CPU Cables
Our motherboard cable is in, but we have to plug in the alternate power cable to complete the installation process. This power cable supplies voltage to the CPU of the PC.
This cable usually has 6-8 pins depending on the CPU you have in your PC. For ease of identification, this cable will usually have CPU spelled on it, making it easier to identify.
The port where this cable needs to be plugged in is located at the top of the motherboard around the CPU socket.
Step #13: Install the GPU
After both the ATX and the CPU power cables are installed. Next, you should install the GPU on the motherboard.
Simply unlatch the single pin holding the PCIe x16 slot in the closed position to install the GPU. You also need to unscrew the two case screws adjacent to the GPU slot.
Now align the GPU with the PCIe slot and push it in. The GPU should snap right into place with an audible click sound.
Once the GPU is installed, plug in the red colored 6+2 pin power labeled as PCIe express or VGA into the GPU. Depending on the GPU, you will need to plug either one or two cables.
Read More:
Step #14: Plug in the SATA Cables
Now is a good time also to plug in the SATA cables, which are the ones that connect your storage drives to the motherboard.
The motherboard’s SATA port is usually located beside the 24-pin power connector. SATA ports have a narrow connector with an indent and a hollow end on one side.
Match the indent of the cable with one of the SATA ports, and the cable should snap right in without any effort.
Step #15: Connect the Fan Cables
Nothing sucks more than finalizing your motherboard installation to realize that you forgot to connect the fan cables. Therefore, I reckon you should install the fan cables as well.
The connector that accepts the fan cable has 4 pins. It will usually be situated around the CPU socket or the tail of the motherboard under the PCIe slot.
Step #16: Connect the Front Panel Cables
The last thing that needs to be done is arguably the hardest. I can’t tell how many times I have messed this up, so it is okay to take this step slowly.
The front panel cables come from the front panel ports and buttons that need to be connected to the motherboard. These include power cable, reset cable, audio cable, USB cable, etc.
The motherboard headers for the front panel connectors are situated at the bottom of the motherboard under the last PCIe slot.
You will need to connect the following front panel headers.
- USB 2.0 and 3.0.
The USB 2.0 cable will plug in the header with 6 pins. Typically the header will be stamped with the USB 2.0 name making it very easy to recognize.
The blue USB 3.0 cable will plug in the motherboard header with 12 pins. It is easy to find the USB 3.0 header because there are not many 12-pin ports on the motherboard.
- HD Audio
The HD audio cable is more or less the same as the USB 2.0 cable, except that it misses one pin. Therefore, the HD Audio header will come in the 5-pin configuration rather than the usual 6-pin configuration.
- Power, Reset, and LED
The power, reset, and led are small 2 pin cables that pose the most difficulty connecting them to the motherboard. Therefore, it is best to refer to your motherboard manual to find the exact spot where to connect these cables.
These cables are bundled together in a single cable that connects directly to the motherboard. In some motherboards, the power, reset, and LED front panel cables are merged into one single cable making them very easy to connect.
Either way, the motherboard for the Power, Reset, and LED cable is situated at the bottom of the motherboard, where all other front panel connectors lie.
To properly connect them do the following.
- When you look at the power and LED connector, the power and led connector will have a positive (+) and a negative (–) pin. If the positive pin comes first, you have to connect the cable facing upwards. However, in the case of the reset cable, the negative pin will be before the positive pin, so in that case, you have to flip the cable upside down and then connect it to the designated port.
Related:
- How to Connect Power Button to Motherboard?
- How to Connect Front Panel Connectors to the Motherboard?
Step #17: Reconfigure and Adjust the Cables Accordingly
While you may be done with connecting all the wires to the motherboard, it is also important to organize them. So, in this last step, to properly install the motherboard on the PC, we will arrange and organize the cables that we have just connected.
Use the cable tie pins that typically come with the case to keep the cables away from the motherboard. Your goal is not to let any cable touch the surface of the motherboard because it can short the motherboard.
Take your time, work on a single cable at a time, and your patience will be rewarded.
Related Guides
Check out some of our related motherboard buying guides.
- Motherboards for Ryzen 5 3600
- Motherboards for Ryzen 5 5600X
- Motherboards for Ryzen 9 5900X
- Motherboards for Ryzen 7 5800X
- Best B550 Motherboards
Check out some of the other related motherboard guides.
- How to Reset Motherboard
- How to Check What Motherboard Do I Have
- How to Update Motherboard BIOS
- What Is a Motherboard
- How to Upgrade a Motherboard
- What Does a Motherboard Do
- How to Update Motherboard Drivers
- How to Test a Motherboard
- How to Test Motherboard Without CPU?
Conclusion
This puts our guide on installing a motherboard inside the PC to a rest. I hope that the method mentioned in the article was easy for you to understand and follow again.
To conclude, I would like to reiterate that a proper motherboard installation requires intricacy. Although they may not seem too important, the small steps are the ones that result in a good motherboard installation or a bad one.
I especially want you to pay close attention to steps 10, 11, 12, 13, and 14. This is because these steps involve connecting cables, and as you might already know, even a slight mistake when connecting cables can lead to catastrophic damage.
Don’t worry or be afraid, though, as if you follow the guide properly, you are guaranteed to achieve great results.
Although the article may be over, don’t be hesitant to tell in the comment section if you face any trouble with any one of the steps. Also, if you have followed the guide to the end, do let me know if this guide enabled you to install the motherboard properly or not.