Taking clips is a fundamental aspect that people in the industry utilize on daily basis. People from all walks of life take clips to add value to their products.
Whether you are a gamer who clips his favorite moments to share with friends or a professional videographer and content creator looking to enhance the iteration of your product, clips are necessary.
The amount of platforms where you can share short clips has significantly increased. Today platforms like TikTok, Youtube shorts, and other similar ones have given rise to short clips.
If you are in the same boat of people looking to take clips and elevate them into a special short video, then you have come to the right place. In this article, we will guide you on how to take clips on a PC.
For your convenience, I am going to list three methods by using three different applications for taking clips. You can pick and choose the one that suits your needs the best. I know you are eagerly waiting for the method so without further ado let’s begin with the first one.
How to Clip on PC with the Xbox Game Bar?
For countless years the most requested feature by the PC community was the addition of a built-in game recorder for Windows 10. Microsoft finally fulfilled people’s wishes in 2019 by adding the Xbox Game Bar.
This application hence serves the purpose of a built-in Windows recorder. Microsoft went to great lengths to ensure that the Xbox Game Bar is easy to use and operate. This application hence is best for an amateur wanting to make clips of video games on a gaming PC.
Since the Xbox Game Bar is built-in windows feature it does not need to be purchased additionally. All you need is an activated copy of windows and a Microsoft account. If this application fits the bill for what you are looking for then process with the following steps to make clips on PC.
Before we get to the steps however make sure that you have Xbox Game Bar enabled in Windows. To do this type enable Xbox Game Bar in the windows search bar and click on the option that appears. On the new window that pops up, you will be able to see an option to enable Xbox Game Bar. If this option is not automatically turned on do so yourself by flipping the switch style selector.
Now that this is said and done let’s get to the actual matter on hand i.e., taking clips through the Xbox Game Bar. One thing I want to point out is that Xbox Game Bar clips are only limited to the last 30 seconds of the game. This is the limiting factor that you have to accept. To clip with the Xbox Game bar, do the following:
- Run the game you want to take the clips off.
- Make sure Xbox Game Bar is enabled. If you have been following the write till now then it should be enabled in your case.
- Whenever you want to save the last 30 seconds of the gameplay as a clip press the Windows + G key.
- In the pop that appears click on the widget menu icon which is next to the Xbox icon.
- From the drop-down menu select the capture option.
- A new pop window will appear here click on the record last icon which is right beside the camera icon.
- By doing this you will successfully save the last 30 seconds of the action.
If you do not want to do this rather cumbersome process of manually going through each menu Microsoft also allows you to record a clip in one linear setup. This shortcut is activated by pressing the Windows + Alt + G key. Once this key combination is pressed windows will automatically save the last 30 seconds of the game.
No doubt that Xbox Game Bar is an easy feature to use. It requires minimal setup, and you can get up and running within no time. As easy as the Xbox Game Bar is it has a drawback as well and that being the quality of the recorded video. The clips that are taken with Xbox Game Bar although fine for personal use lack the professional quality about them.
You May Also Like:
Is 8GB RAM Enough for a Gaming PC
How to Clip on PC with the Graphics Card Software?
Up next presenting to you the graphics card method. Irrespective of the company both Nvidia and AMD have graphics card software that supports taking clips on PC. The clips that are taken with the graphics card software also have better quality than Xbox Game Bar.
Before I begin with the method make sure that you have updated drivers of both. To update the drivers, head over to the software of the respective brand i.e. Geforce Experience in the case of Nvidia and Radeon software in the case of AMD. Now that this is done let’s get to the actual method of taking clips starting with Nvidia.
For Nvidia Graphics Card
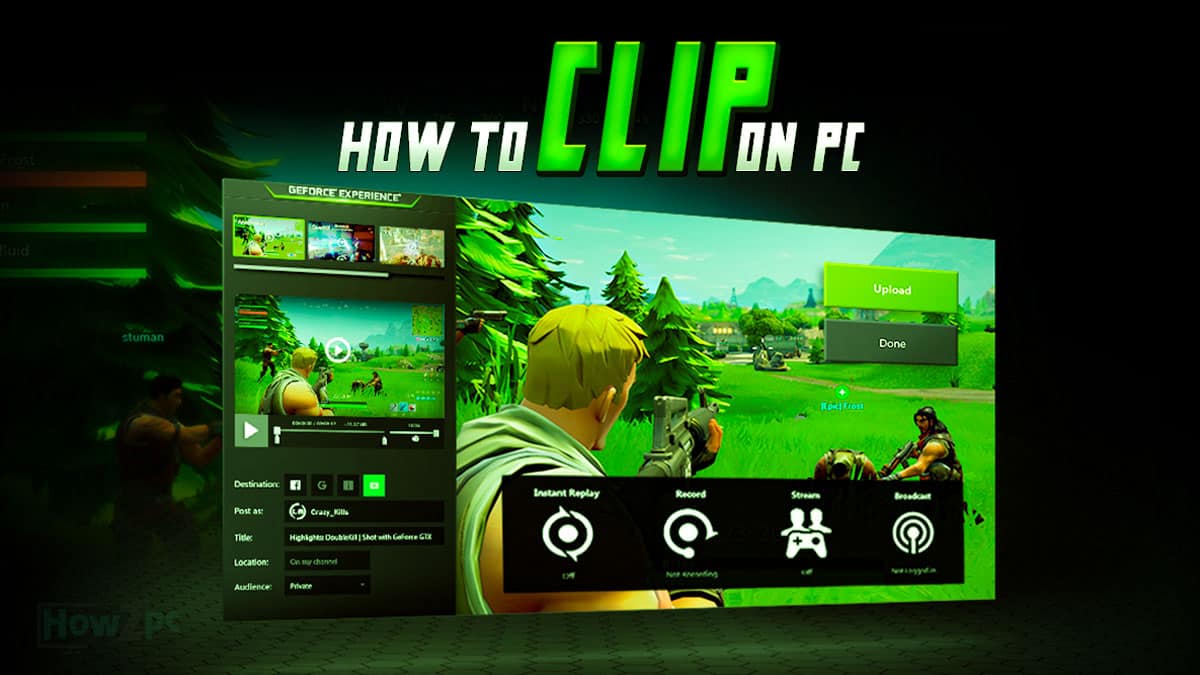
Here we will use the instant replay feature that is available in the GeForce Experience to create clips. The process for that is as follows:
- Press the Alt + Z key to bring up the GeForce Experience Overlay.
- On the new window, that pop-ups click on the Instant Replace option to turn it off.
- Once turned off, head into the settings.
- Here determine the instant replay length that needs to be captured. Also, adjust the quality depending on the hardware configuration of your gaming PC. For a low-end PC use low or medium setting preset while if you are running the latest generation gaming build then use the High setting preset. Keep the resolution, frame rate, and the Bitrate on the default value. Once that is done press the save button.
- Up next click on the gear icon to go in the general setting menu.
- Navigate to the Recordings and open it. Under the Videos section set your desired folder in which you want the instant play recording to save.
- Once done head back out again in the main menu and now click on the Keyboard shortcuts option.
- Here navigate to the Record heading and set the desired keyboard key you want to use as a shortcut for saving an instant replay.
- Congratulations we are finally done with everything. Now you can just use the shortcut key to record clips from your last played gameplay.
As you can see Nvidia provides a lot of leeway in terms of user customization and although this method may seem intimidating at first once you begin with the process is becomes rather easy. Since Nvidia is now done let’s move to the AMD part.
For AMD Graphics Card
The Radeon software is just as competitive as the Nvidia one when it comes to creating clips on PC. The process however is much simpler on AMD.
- Press Alt + R to bring up the Radeon Overlay.
- In the Radeon Overlay look for the gear icon which is situated on the top-right of the window. Once found click on it.
- Head over to the Record & Stream tab next.
- Navigate to the Media Section and turn on the instant replay option here.
- While we are here set the Instant Replay Duration to the desired time.
- Next switch tab again, now to the Hotkeys one.
- Here under the Media Hotkeys section set the keyboard shortcut for the Save Instant Replay option. Or else if you are content with the default key bind leave it unchanged. The default key bind is CTRL + SHIFT + S.
- We have now successfully enabled the instant replay feature which will allow us to create clips on PC.
Just in these simple steps, you can create clips on a PC with AMD Radeon Software. This sums it up for our gameplay recording. The three methods we mentioned above and foolproof and reliable and now let’s get to how you can clip other content on PC besides gameplay.
You May Also Like:
Best Cheap Gaming PC Under $500
How to Clip on PC with the OBS Studio?
OBS Studio is a very popular application that many gamers, as well as professionals, use for their recording needs. The latest update of OBS Studio has allowed the creation of instant replays hence which translates into a clip.
The main advantage of using OBS for clips is that OBS is not limited to just the game it can record any scene. Another major plus point of OBS Studio might be the reason many people use it for the customization OBS provides.
If you are stocked by what this software has to offer, then download it right away so that without wasting any more time we can directly head into the method which you can use to create clips on PC by using OBS Studio. After downloading and installing the latest version of the program follow the steps below:
- Open OBS Studio. When opening the application for the first time you will need to adorn to some rules. Do that.
- When in the OBS window open the setting menu.
- Here head over to the output option and then check the box that says Enable Replay Buffer. While we are here set your desired time as well.
- Back out to the general settings again and here check the box to Automatically Start replay buffer when streaming.
- Now proceed to the Hotkey settings and set your desired keyboard key or a combination of keys for saving the replay buffer.
- We are done with the settings menu. Close the settings menu now and navigate to the bottom right of the OBS Studio screen.
- Here we will find the button to start the replay buffer click on it.
- Head over to the scenes and add a new media source next. Name the new source Start Replay Buffer, and then select the Replay buffer file which will be located in the Videos folder with the name replay.
- Once done now back out again and now head over to the top of the OBS Studio screen and click on tools, followed by scripts, and then select instant-replay.lua
- Now head to the Media Source drop-down and add the source you created in the scene tab.
- Now for the last time open the OBS Studio settings again. Head to the Hotkeys section like previously done. In this section now there will be a hotkey called Instant Replay. Set the keyboard combination for this option as well.
- After doing all this successfully your Instant Replay is ready. Whenever you need the last action saved simply press the hotkey combination you made for the Instant Replay.
Not going to lie setting up an Instant Replay with OBS Studio is not easy and especially not for someone who has not worked with OBS Studio before. It requires a tedious process to set up the Instant Replay feature but once it is all set up the outcome is very rewarding.
OBS Studio will create the clips with the best quality, and you can use the OBS Instant Replay feature outside of games to create clips on regular stuff. This is beneficial if you want to record a part of an ongoing video. OBS Studio’s use also extends to businesses, professionals, content creators and even streamers so this program is not only restricted to gaming.
Related Guides
Check out some of our related guides below.
Conclusion
This wraps up how you can clip on PC. I hope you found this article helpful. Before I close off do keep in mind that you do not necessarily have to go with the best possible option out there and if operational difficulty is something to go by the best methods will require the most work on your end to set up properly. Therefore, go with something that fulfills your needs and at the end of the day gets the job done.