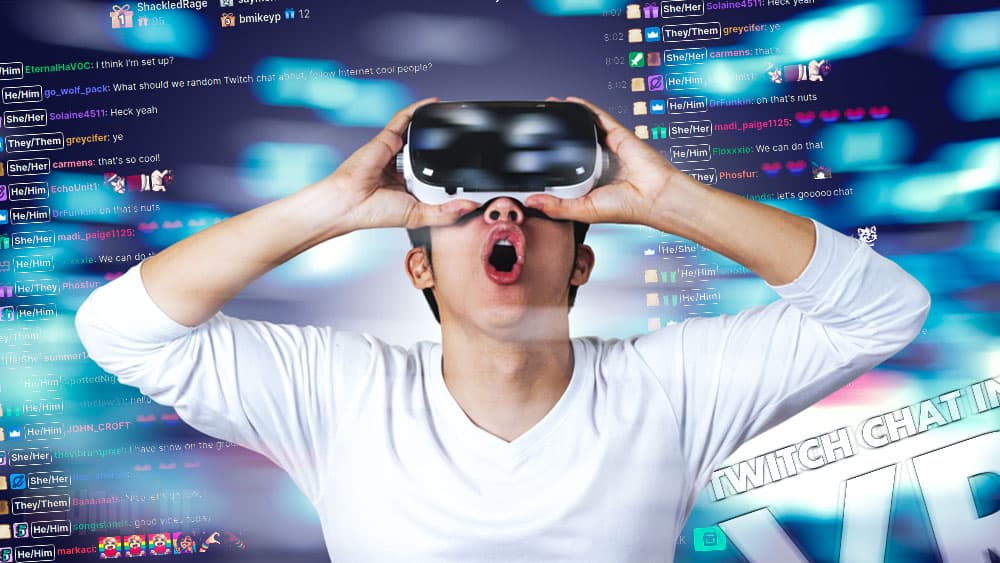
Do you belong to that group of VR streamers that constantly peek through their VR headsets to take a glimpse look at the chat?
If only one can cut all the hassle and integrate Twitch chat in your VR setup but wait you can, and I am going to tell you all about it in this article.
This article will provide you a comprehensive guide on how to view your twitch chat in VR by using the following two applications.
- OVRDrop (both free and paid)
- LIV app
Don’t worry If it is your first time hearing these names. As we proceed I am going to tell you what they are, the strength of each VRchat application, and then I will provide a step-by-step guide on how to set up Twitch chat in VR with each application.
I realize how frustrating it can get for you as well as your viewers when you miss important chat updates.
Are you ready to open the door to the possibilities of VR Twitch streaming? I definitely am, so let’s begin
RELATED:
Can’t Watch Twitch Stream Because of Buffering? Let’s Fix It
How to Stream VR With Twitch Chat Using OVR
OVR (OpenVR) is the most popular application amongst the Twitch community to view Twitch chat while streaming VR games.
The application is compatible with all mainstream VR headsets in the market that being HTC Vibe, Oculus Quest 2, and Valve Index.
To use the application, you have to buy it on steam for $11 although a free version also can be had on GitHub. There are some major differences between the two which you should know before you plan on going with either version.
RELATED:
How to Set Up Private Stream on Twitch
What Is the Difference Between the Steam Version and Hotrian Version of OVR?
Besides being paid and free of course these are some of the major differences which you should know about.
- The paid version of steam supports a resolution of 1440p at 200-300 FPS while the free hotrian can only handle a resolution of 360p at 30FPS.
- On the paid steam version, you get a whole lot more features compared to the free hotrian version of OVR. These features may range from simple interface customization options to advanced integration modules. The features may or may not come in handy to you, so before you choose either version dig more into what you want.
- The other difference major difference is that the Steam version of the application uses your graphics card power for running while the free Hotrian version of the application runs on your CPU.
Depending on the PC RIG you have, and the resolution or features you want choose the version according.
The method I am going to show next works on both the Steam version and the Hotrian version.
RELATED:
Can’t Stream on Twitch Because of Lag? Let’s Fix It
Method for Setting up Twitch Chat VR Using OVR
Step 1:
Download and install the OVR toolkit application from either steam or through the Hotrian Github page. On the Github page, it will be labeled as OpenVRTwitchChat. To download click the first file under the Asset heading.
Step 2 (Optional- only If you are using the free Hotrian Version):
To install the file you just downloaded, create a new folder on your desktop. Now head to the Downloads folder on your PC and extract the OpenVRTwitchChat zip file in the folder you just created.
Step 3:
Open steam and launch the SteamVR application. Once done, proceed ahead to launch the OVR application as well from the desktop folder.
Step 4:
Upon opening the OVR app, it will prompt you to enter your Twitch credentials in the following fields.
- Username
- OAuth Key
- Channel
Enter your details in the specified fields and then hit the Press to Connect button.
Step 5:
To open chat in VR, we first have to pop out the chat into a separate window. To do this,
- Open your Twitch channel in the browser.
- Go to your profile and then hit the chat option.
- Then, you need to press the gear icon for chat settings and switch to Non-Mod Settings.
- Lastly, click on the Pop-out Chat option. A separate chat window will pop out.
- Close all the tabs of the browser.
Step 6:
Now access the drop-down menu on the bottom left of the screen by clicking on the option that says World. From this drop-down menu choose either the left or the right controller which you are going to use to bring up the VR chat.
Step 7:
After selecting the controller, now we need to change how VR chat looks in our field of view.
- Navigate to the bottom right of the screen and set the drop-down menu to None.
- Change the value in the above two fields according to your preference. One is for opacity and the other is for size.
Step 8:
We are almost done. For the final phase, there is some testing to do before we call it a day. Open your broadcasting software and add the browser chat window. Next Go live, bring up your Twitch chat by using the controller you selected, and see if things pan out as you see in the picture below.
RELATED:
Not Sure About Twitch Profile Picture Size? Let’s Find Out
How to Stream VR With Twitch Chat Using LIV
LIV as a Twitch VR chat application has been gaining quite a popularity recently. The best aspect about Liv is that it is entirely free to use and features a user-friendly interface.
The application is also not light on features. Contrary to the popular belief one may have for a free-to-use platform Liv actually delivers quite a chalk full experience.
This application is also compatible with all the major VR headsets which include HTC Hive, Oculus Rift, HTC Vive, and Value Index VR.
Therefore, regardless of which platform you are on this application makes for a fantastic beginner option into the world of Twitch VR chats.
YOU MAY ALSO LIKE:
Best Twitch Name Generator
Method for Setting up Twitch VR Chat Using LIV
Step 1:
Head over to the Stream Store and download the LIV application.
Step 2:
Once downloaded, open the LIV application and press on launch Streamerkit.
Step 3:
Now Enter your Twitch and OBS credentials to connect both accounts to LIV.
Step 4:
Once the accounts are connected proceed to the alert section. Here select which notifications you want alerts to pop up for.
Step 5:
With LIV launched put your VR headset now. You will see a chatbox on the top of your head. The chatbox is therefore live and now all you need to do is adjust the size, opacity, and position of the chatbox according to your preference.
Step 6:
To change chatbox settings open the Steam VR application and launch the desk view. Now open your LIV Streamerkit if it is not already open.
Step 7:
On the Streamerkit window click on the General tab. Here you can change all the settings. Fiddle with each slider and option until you find your desired Twitch box appearance and size.
Step 8:
Once everything is done and you are satisfied with the result of the Twitch chat box, close the application and take off your VR headset. Next time when you put your headset on to Stream VR game the Twitch chat window will be positioned where you left it when closing.
READ MORE:
How to Stream Switch to Twitch Without a Capture Card
Audio Mixer for Streaming
Conclusion
I hope I have explained each step of both the methods in a simple and easy manner. By following the above-listed methods, you can set up Twitch chat in your VR headset in no time.
Let us know in the comment section which application did you end up using for your Twitch Chat VR services? Was LIV your choice because it is free or OVR because of its popularity? Also, let us know which application would you recommend for your fellow twitch VR streamers.