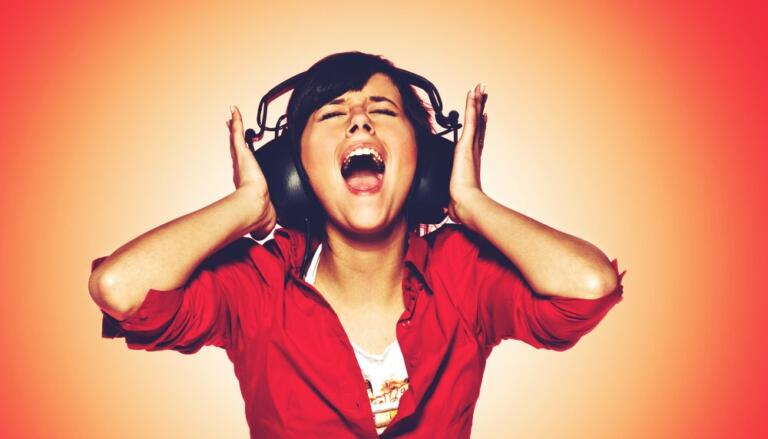
Not being able to get the full sound of your headphones can leave you disappointed but do you know that most of the time you can fix your quiet headphones with simple remedies.
In this article, I am going to tell you about everything you need to know to get your headphones sound to a high output level.
For this article the article will include the following:
- The issues that are causing your headphones to be quiet
- How to remedy these issues and fix low sound problem
- Some common precautionary measures to never again experience low sound level on your headphones
If your headphone sound is not on the excepted level, you can consider yourself not alone. Since there are a lot of different headphones variants these days this issue can occur.
Most of the time the common cause of this issue is incompatible or low-quality headphone gear, but the roots of this problem run deep.
Therefore, to uproot this problem and get rid of it from the ground up I am going to thoroughly explain myself on each turn.
So, without any more delay let’s dive straight into the issues that cause your headphones to be quiet.
RELATED:
On-Ear vs Over-Ear Headphones
Why Are My Headphones So Quiet?
These can range anywhere from simple tasks like swapping out cables, updating sound drivers, and fiddling with some onboard settings or complex ones like a faulty soundcard.
Stop you don’t have to write these issues down because coming up next is a list of the issues that cause low sound output in headphones.
A Quick Look at the Issues That Are Causing Your Headphones to Be Quiet
The following are the issues we will be examining in this article that cause headphones to produce a quiet sound:
- Headphone connectivity Issue
- Incompatibility of audio files
- Device setting issue
- Headphones not creating a proper seal
- Internal sound card not powerful enough for headphones
- Accumulation of dust, grit, and earwax around the headphone driver
- Sound limit imposed by the device you are connecting headphones to
- Faulty circuit or loose internal joints on the headphone
- Broken or ripped cables
RELATED:
Best Surround Sound Headphones
An In-Depth Explanation of Each Issue
Now that you know what issue to expect, coming up next is the in-depth explanation of how these issues hamper the headphones from achieving sufficient volume.
1. Headphone Connectivity Issue
The most common issue that entails headphone quietness is the lack of proper connectivity. This can happen in both wired headphones and wireless headphones.
In the case of wired headphones either the cable is loose and not plugged in correctly or the cable used for transmitting audio is damaged.
Either of these can result in loss of audio transmission and since most of the audio signal is lost hence it results in low sound production in headphones.
For wireless headphones most likely this issue persists because of statistical interference. This is more common in headphones and devices that use an older Bluetooth encoding technology which is more susceptible to transference than the newer ones.
RELATED:
Best Open Back Headphones
2. Incompatibility of Audio Files
Chances are the issue does not persist on your end but rather the audio file you are consuming is incompatible with your headphone.
This can occur if you are trying to play audio files that are rendered in a unique format and are not playable on mainstream audio gear.
Corrupt or Badly Rendered Audio Files
It is not uncommon to find badly rendered audio files on the internet. Badly rendered or corrupt files mean that the audio is not properly decoded using appropriate gear before compiling.
This results in very bad quality audio recording. These are mainly common with copyright songs and movies that you find on YouTube and other similar places.
If your headphone produces low sound output on such websites, then it is not the fault of the headphone but rather of the native audio format of those websites.
3. Device Setting Issue
Software is the main driving force of any peripheral today even the headphones. Without software backing them up, a headphone cannot function.
The audio software is responsible for the headphones is usually a part of the device that the headphones are being connected to. Hence due to the direct involvement of software if the audio settings of your device are not configured properly it can mess up the sound of the headphones
Depending on the device you are using the effect of this on your headphone can be negligible or highly influential. Sometimes to the point where it can completely alter the sound coming from your headphones especially on a computer.
RELATED:
Best Open Back Headphones for Gaming
4. Headphones Not Creating a Proper Seal
This is a common affair to which little attention is paid. Unfortunately, since we don’t get to pick different earpads sizes for our ears this issue can exist quite often.
If the earpads of your headphone are not able to create a seal around the ear, then the sound can leak to the surrounding. The less prominent the seal the more the sound is allowed to escape.
This can ultimately lead to low sound levels for your headphones.
5. Internal Sound Card Not Powerful Enough for Headphones
Every electronic device that you connect your headphones to has a sound card to process the electric audio signal into a digital signal that can be used to produce sound.
If the sound card of the device, you want to pair your headphones with is not efficient enough it will not be able to decode electric audio signals into digital signals fast enough for the headphones to produce sound.
If this happens, there will be a loss of audio signals and hence in turn your headphones will produce sound from the remaining signals at a lower volume.
6. Accumulation of Dust, Grit, and Earwax Around the Headphone Driver
The buildup of dust and earwax around the headphone driver can also block sound produce by the driver and hence delivering only the partial sound that gets filtered through.
This issue is common because most of us don’t tend to clean our headphones more often. Eventually, if this practice keeps taking place particles will build up that will slowly become significant enough to block a large amount of sound coming from the driver.
7. Sound Limit Imposed by the Device You Are Connecting Headphones To
Another plausible reason why your headphone is not maxing out the audio might be because of the device limit. It is common for devices to restrict volume when Bluetooth headphones are connected to them.
Unfortunately, tapping on the volume + button again and again won’t help here because in some devices the amount of volume Bluetooth headphones can achieve is hard locked to a certain level from the factory.
If you have this issue then don’t worry because with the proper method this restriction can be made to cease.
YOU MAY ALSO LIKE:
Open Back vs Closed Back Headphones
8. Faulty Circuit or Loose Internal Joints on the Headphone
Headphones are subject to daily wear. When we use our headphones daily, we are putting stress on the internal components of the headphones.
And let’s be honest no one among us can’t deny that he hasn’t dropped his headphones or plugged on the wire by mistake.
All I am saying is that the constant stress that we put our headphones through accumulates in the long term and eventually cripples the internal circuit system of our headphones.
This leads to less current being circulated in the circuit and eventually results in a low sound output level.
9. Broken or Ripped Cables
The cable attached to a headphone is the most vulnerable to damage because of its sheer fragility.
Even a slight intentional push or a bend can permanently break the internal fibers of the cable leading to disassociated headphone connection.
Rips and tears in cables are very difficult to find because most of the time you will be dealing with a slight cut at any point in the wire.
Although hard to see even a minute cut can dislocate the connection and hence cause your headphones to output only a limited amount of volume.
YOU MAY ALSO LIKE:
Headset vs Headphones
How to Fix the Headphones That Are Quiet
Quiet sound output in a headphone can be easily fixed with the right diagnostics. Once you know where the issue is generating from slowly work your way to eliminate the problem.
Now that you know the issues that cause headphones to display a quiet sound, let’s get to troubleshooting these issues with the following methods.
Some Common Prerequisites
Before I begin with the more complex stuff it is important to verify some core prerequisites. This way we can ensure that the problem we are facing is not a basic one because it takes a minute or two to fix these basic problems.
It would be a waste to spend all that time on complex solutions only to find out the issue could have been rectified within minutes.
With that being said, the following are some common prerequisites that you should take.
1. Turn the Volume all the Way Up of the Device.
A simple yet foolproof solution. Make sure that you have the volume all the way up of the headphone.
This not only applied to turning the volume all the way up through sliders or buttons but also in settings.
Head over to the volume setting of your device to double-check if the volume is all the way up. Sometimes sliders and buttons fail to turn the volume to the maximum hence a manual override is needed.
YOU MAY ALSO LIKE:
What Does a Headphone Amp Do
2. Remove Volume Limits for Bluetooth Headphones
In case you are dealing with a device that restricts volume for Bluetooth headphones then here’s how you can remove that restriction.
For mobile (Android)
- Head over to your mobile’s general settings
- Select the About Phone option
- Navigate to the build number option and tap on that 7 times, until you get a prompt saying You are Now the Developer or Developer Options Enabled
- Now head back to the general settings page and open the System menu and then select the advanced option drop-down
- Then open the Developer Options setting
- Scroll down in the Developer Options settings menu until you find an option labeled as Disable Absolute Volume. Tap on this option to enable it.
- The process is now complete. Simply restart your device and enjoy listening to music on your headphones at the volume of your choice.
For iPhone
- Head over to the general settings
- Swipe down on the screen to bring up the music option
- Navigate to the playback heading, and tap on Volume limit
- Now to remove the volume limit simply drag your slider on the extreme right. In some iPhones, you might need to uncheck this option if the slider is not available.
For Windows
- Connect your Bluetooth headphones to the PC
- Navigate to the Windows search bar and type control panel and hit enter.
- In the control panel window select View devices and printers option
- Right-click on your Bluetooth headphone that is connected to the PC and select Properties from the drop-down menu
- Now switch to the Services tab and here uncheck the Handsfree telephony option.
This is how you instantly remove volume limits for your Bluetooth headphones on Android, iPhone, and Windows.
3. Make Sure your Headphones are Connected Properly
This may seem like a no-brainer, but I assure you it can happen to the best of us. You have to keep two things in mind to get the perfect cable connection.
The first is to make sure that all cables are connected to their appropriate ports and by this I really want you to double-check each and every connection.
The next is to make sure that each cable sits right within its port. The cable should not be loose, dinged, or partially in.
Make sure these two things are right and you are guaranteed a good connection.
On the topic of Bluetooth connection just make that there is no interference between the headphone and the device they are connected to.
YOU MAY ALSO LIKE:
What Does a DAC Do for Headphones
4. Verify that your Headphones are Not faulty
It goes without saying that before we begin solving the issue make sure your headphones are not faulty.
It would be a shame to try out all the solutions only to find that you are dealing with a faulty pair of headphones.
For checking the headphone simply plug remove it from the current device it is plugged into and connect it to another device ideally of the same nature. If your headphone is connected to a PC, then connect it to a laptop and vice and versa.
If you connect it on the same platform, it eliminates most of the other variables that affect sound and therefore allowing us to conclude the state of our headphones with much more assurance.
If you connected your headphones to another device and are still experiencing low sound levels, and also tried all of the other prerequisites to no avail then proceed let’s to the more complex solutions.
More In-Depth Solutions
The following are some more complex solutions that require a more hands-on approach.
1. Clean your Headphones
Although this may sound like a straightforward job, I assure you it is far from easy. Still, the importance of cleaning your headphones from the inside cannot be underestimated.
For cleaning your headphone driver and other internal components you will need additional tools other than the typical microfiber cloth. These include a fine brush with a soft tip and a Philips screwdriver.
The cleaning process will be as follows:
- You will first unscrew the earcups from the frame with the help of a screwdriver. On some headphones, this is not necessary while on others it is a requirement.
- Then you will remove the earpads from the earcups. Most headphones have latches that hold the earpads in. A slight nudge is required to free the earpad from the latch. Just be sure to distribute your force evenly when pulling on the earpad and not concentrate it on a single spot to prevent any damage.
- Once the earpads are off we can get to the cleaning part. Gently stroke your brush along the crease on the headphone and blow the dust-out. For flatter surfaces, you can use a microfiber cloth to remove dust and other particles.
- Once the surface is thoroughly cleaned assemble back the headphone and see if cleaning made any difference.
For cleaning headphones, make sure that you don’t use any water because it can short out of the electronic circuit inside.
RELATED:
How to Make Headphones Louder
2. Use a Headphone Amplifier
Headphone amplifiers are devices that boost the sound output of your headphones by supplying your headphones with higher energy signals.
This allows the headphone to convert these higher signals into a sound that is louder than the usual.
All electronic devices be it a mobile phone, computer or laptop have built-in amplifiers but the quality of those is not up to snuff with the latest stuff out there.
Being integrated with the other electronic components in a hardware loop does not help either but it can lead to some interference which can cause the audio to become muffled.
This is why most audio professionals resort to external headphone amplifiers. This device when paired with a headphone can make heaps of difference compared to the stock amplifier that is installed in your device.
There is a thorough article available on our website if you want a more in-depth look at DAC AMPs.
Anyhow, the gist of it is that by using an external amplifier you can greatly increase the sound output of headphones and hence eliminating the headphone quietness problem.
3. Install Volume Boosting Apps
The volume-boosting apps like the name suggest function exactly like they sound. These apps are specially programmed to increase the current volume of your device.
Although they are not as effective as let’s say an amplifier, they do work to some degree. These can never be your permanent solution but for a while, they can get the job done.
These applications work in the same principle as an equalizer. They provide you with a slider to boost your frequencies past the default zone.
By having the frequencies max out the sound will be increased by then again not by much. Still enough to be noticeable.
The best applications I can recommend for this purpose are Precise Volume and Equalizer Fx for Android phones, Boom Music and Keiser Tone for iOS, and Equalizer APO and Boom 3D for Windows.
4. Replace Earpads for Proper Fit
As mentioned above sound can also leak if your headphone does not fit you properly. The main thing that concerns fitting are the earpads of the headphone.
These rest against your ears and create a seal around them. Since we as human beings have different ear sizes and shapes no one-size earpads fit us all but unfortunately when buying headphones, we only get a single-size option.
To get the most optimal fit and reduce sound leakage get earpads for your earpads that have a similar contour as your ear and roughly match your ear size. You can go for slightly bigger earpads but not smaller ones.
One thing is to note that when buying after-market earpads for your headphone make sure you follow the diameter measurement provided by the manufacturer.
You can get different-sized earpads but make sure the ring diameter of the earpad is the same as the stock one so that it can get attached to the earcup without any hassle.
The material of the earpad you go for is entirely dependent on which you prefer but do keep in mind that leather holds sound the best and prevents it from escaping to the surroundings.
5. Update Your Audio Drivers
Keeping your audio drivers up to date is another step to procure proper long-term sound output. All our machines have drivers to interpret audio recording and without them, the sound will not be rendered by the machine you have plugged your headphones into.
Call it our ignorance but the truth is most of us don’t update our drivers which affects the sound output of our headphones. To update your drivers on PC do the following.
- Right-click on the This PC icon and select the Manage option from the drop-down menu.
- A new window will open. Here on the left-hand side, navigate to the Device Manager option and click on it.
- Now click on the first option named Audio inputs and outputs.
- Upon clicking on it will expand to reveal some options. Choose the soundcard your headphones are connected to and right-click on it. If you are unable to figure that out simply click on the volume icon and see what is written above the volume slider and choose it.
- Lastly, click on the Update driver option and subsequently Windows will start the process.
- Let the process run to its full length. Windows will automatically install the new driver when it finds it.
6. Turn on Loudness Equalization
Loudness Equalization is a feature built into the Realtek Audio Manager for Windows. This feature is very effective in increasing the volume of the headphones.
- Navigate to the Windows search bar and type Realtek Audio Console and hit the Enter key.
- If nothing shows up the download Realtek Audio drivers from your motherboard manufacturer’s website and then install Realtek Audio Console from the Windows Store on your PC.
- After completing the download open the program by following step 1
- Once the Realtek Audio Console is opened, click on the Realtek Digital Output option located on the left-hand side under the Playback Devices option.
- Upon doing this you will be greeted with a new page. Scroll down to the bottom of this page and switch on the toggle for the Loudness Equalization option.
The Last Resort
I don’t want to be that guy neither I am a health professional but if nothing none of these methods work then I am afraid you will need a hearing checkup as well.
While I know that sounds quite frantic but believe me, it can happen if you have been listening to your headphones for a long time constantly at high volume.
While it may not be the case with you, and I hope so but it is important to get it verified by a health professional.
READ MORE:
Best PC Headsets Under $50
How to Use Single Jack Headset on PC Without Splitter
Headset Not Working on Discord? Here’s How to Fix it
How to Connect Bluetooth Headphones to PS4
Best Equalizer Settings
Conclusion
Now it is time to wrap the article. To quickly summarize all that we went through. Multiple issues can cause a reduction in the sound level of your headphones but luckily this problem can be solved.
There are many helpful methods in the article that will help you solve this issue. I hope that you find our guide and troubleshoots helpful.
Let us know in the comment section which method worked for you also while you are there tell us the extent of the problem you are facing. Is the volume of your headphones very low or somewhat useable.