Do you want to test your motherboard without a CPU installed? Then this is the article for you.
Perhaps you have bought a new motherboard you want to test before putting in your CPU, or maybe your existing motherboard is not turning on.
Irrespective of the situation, testing the motherboard without the CPU will save you a lot of trouble later on. So, how can you do it?
To test the motherboard without a CPU, connect it to the PSU. Make sure that the motherboard is placed on top of a non-conductive anti-static surface. While testing your motherboard without the CPU, you may keep other PC components, and peripherals, such as RAM or a hard disk, detached.
We will go over two step-by-step methods for testing the motherboard without the CPU, so pick the one that is the most convenient for you.
So, without further ado, let’s begin.
What Is the Benefit of Testing the Motherboard Without the CPU?
You might be wondering why I need to go through the process of removing the CPU from the motherboard to test the motherboard. Well, I will give it to you. It is a valid question; however, testing the motherboard without the processor has its merits.
For starters, if you are building a new PC, there is no way to verify if all the new components you bought are in perfect working condition.
Putting together a PC from scratch is a tedious task, and even worse is finding out that the motherboard you have bought is not working after all that effort. Such motherboards that don’t work out of the box are termed DOA (dead on arrival).
Most manufacturers accept returns for DOA motherboards. Therefore, testing the motherboard before building a PC is a very healthy practice and will save you a lot of stress later on. Many seasoned PC builders prefer doing this before putting the whole build together.
Meanwhile, let’s assume your PC suddenly stops working and is not turning on. Mostly, that’s because of the motherboard, but with every other component attached, it is hard to verify it.
Checking the motherboard without the CPU basically means that you are cutting out any variable. Therefore, it will allow you to determine if the motherboard is really the culprit behind the PC not turning on.
What Should You Know Before Testing a Motherboard Without the CPU?
Before I dive into the different processes for testing motherboards without the CPU, there are certain things that you need to know. Knowing these specifics will keep you from getting confused later on.
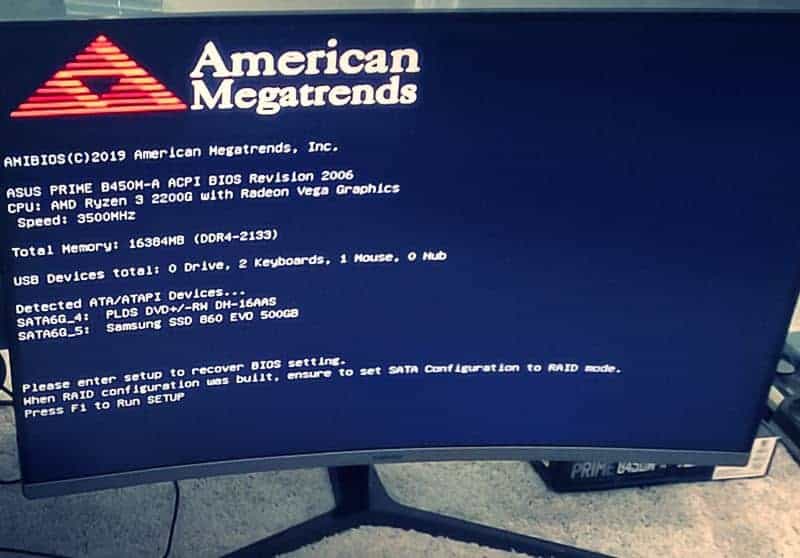
The first and most important thing you need to understand is that when testing the motherboard without the CPU, you will not receive any POST (Power-On-Self-Test).
While the name may be confusing, POST is simply referred to as the first starting screen of the PC. Hence, it means that your monitor screen will not turn on throughout this testing process.
I know what you are wondering – if the screen does not turn on, how to determine that the motherboard works?
Modern motherboards have some systems in place that allow users to check the motherboard without going into the BIOS.
The two main components that can help identify the condition of the motherboard are
- Beeping sounds
- LED Flashes
Through these, we can identify if a problem exists in your motherboard. To know how that works, continue reading.
How to Test a Motherboard Without the CPU?
The following is the step-by-step method for testing the motherboard without a CPU.
1. Set Up a Bench Test Station for Your Motherboard
Bench testing, as the name suggests, is the process of testing the PC components outside of the case. Don’t worry; you won’t need any special tools to set up bench testing for your motherboard.
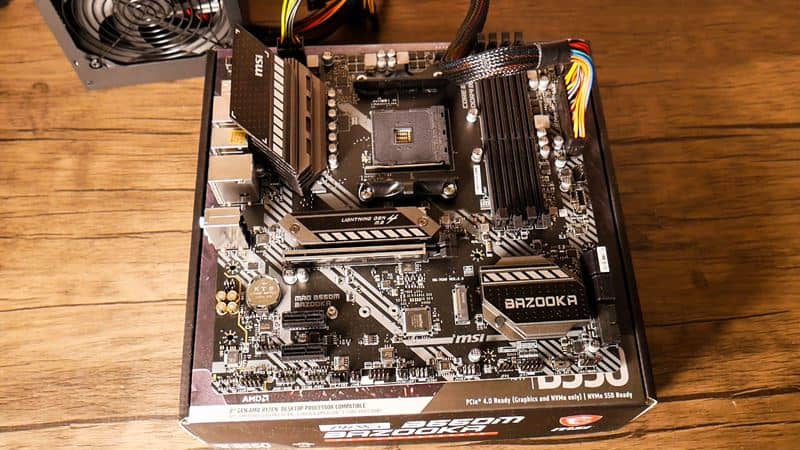
Simply take the motherboard out of its box. Close the box lid and place it on the top of a desk. Now place the motherboard on top of the box. Ideally, beneath the motherboard, you should put the anti-static protective plastic that the motherboard comes wrapped in.
What if the motherboard is inside the PC case? In that scenario, it is best to remove the motherboard from the PC case and then remove the CPU installed on it.
Note: Do not place the motherboard on a conductive surface like metal. Doing this will permanently damage the motherboard. A motherboard has multiple solder points; if any solder makes contact with the conductive metal, it will transfer electricity, harming the motherboard’s delicate PCB.
2. Set Up Your PSU and Plug the Power Connectors Into the Motherboard
After the motherboard is all set up, the next thing you need to do is to set up the power supply in the appropriate spot.
Ideally, you want the power supply positioned close to the motherboard because the power cables connecting to the motherboard are often not long enough. Hence, I advised placing the motherboard on a desk with enough free space.
When placing the PSU on the desk, ensure the fan side is positioned upwards, facing the roof. If you place the PSU fan side down, it will choke due to lack of air.
Now comes the interesting part, i.e., connecting the power cables. There are two main power cables you will need to connect.
- 24-pin ATX power cable
- 8-pin CPU power cable
Connecting the 24-Pin Power Cable
The ATX power cable is the largest cable coming out of the PSU; hence there is no way you will confuse it for any other cable. Still, the following is what the 24-pin cable looks like for your ease.
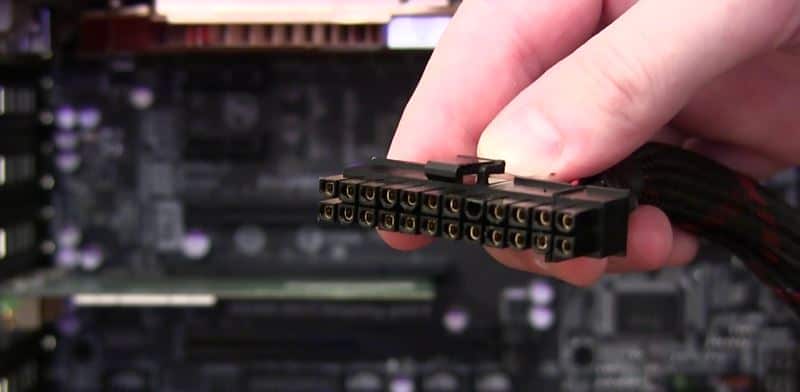
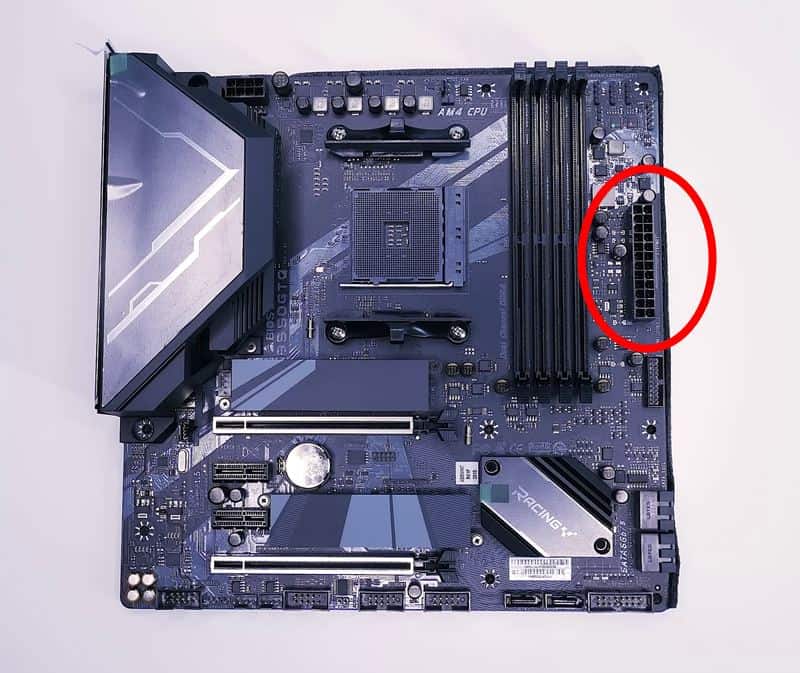
This cable will plug into the 24-pin connector on the motherboard. If you follow the picture above, you can see that the 24-pin connector is located near the RAM slots. Typically, in most motherboards, the location of the 24-pin connector is the same.
Even if the layout of your motherboard differs, you can easily recognize the connector by its distinctively large size and 24 pins protruding from the circuit.
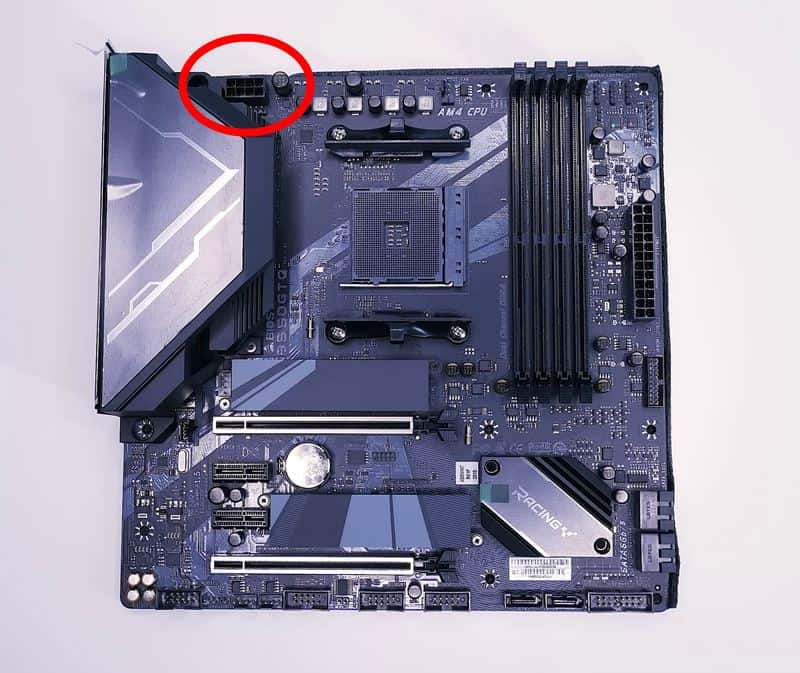
Connecting the 8-Pin CPU Power Cable
The 8-pin power cable, also known as the CPU power cable, connects to the 8-pin port located at the top of the motherboard near the CPU socket.
The 8-pin power cable is not as easily recognizable as the 24-pin ATX cable. To make it easy for you, I am attaching a picture below.
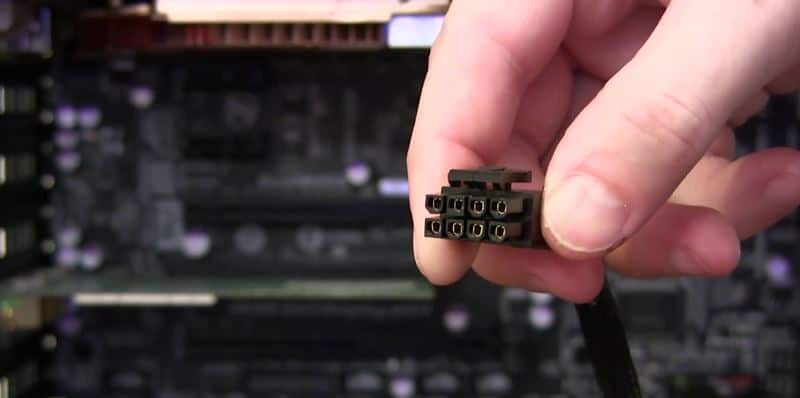
Note: Both the 8-pin and the 24-pin cables come with the PSU. Also, sometimes the 8-pin power cable may come in an 8+4 pin configuration, so do not get confused. It is still the same 8-pin CPU power cable.
Some high-end professional CPUs require more power. Therefore, power supply manufacturers provide an additional 4-pin CPU connector to cater to those customers.
Rarely will you see the CPU power cable with 4 pins, but it is possible. That is only if you are using very old hardware; I am talking about hardware over a decade old.
3. Installing or Removing Other Components (Optional)
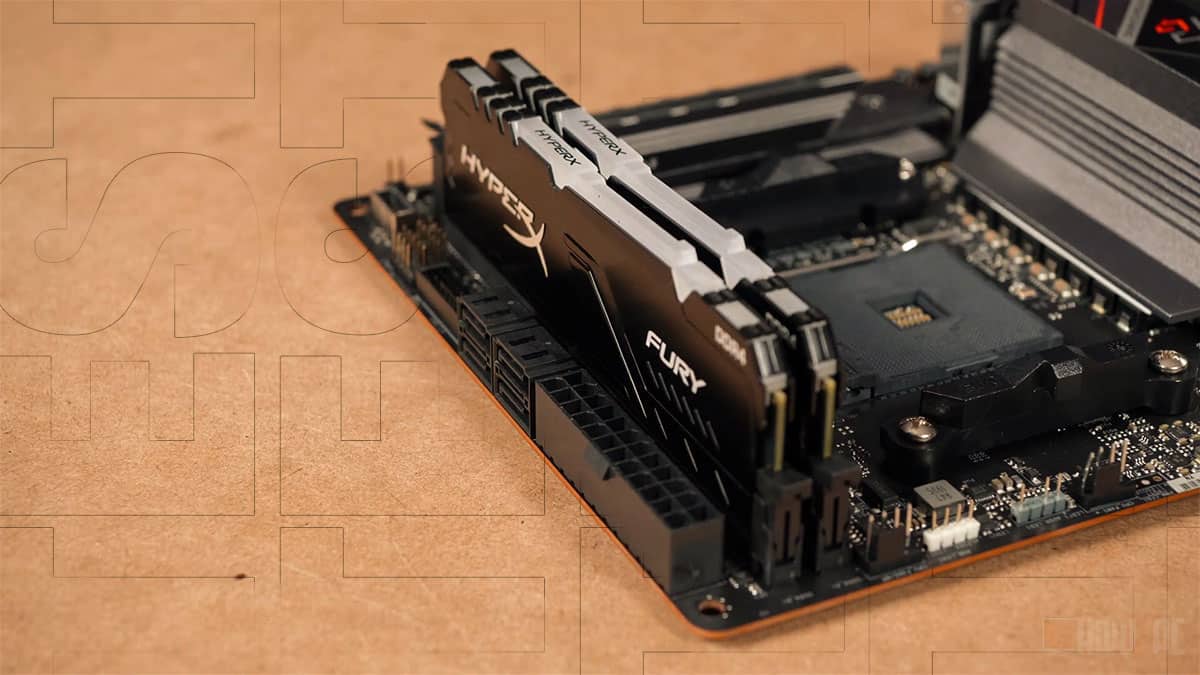
At this stage, you can attach other components such as RAM, hard disks, or the GPU if you want to the motherboard.
However, doing this will bring no extra benefit, so I recommend skipping this step unless you want everything on your motherboard to be ready and in place when you put it inside the PC case.
On the contrary, if you are working on a motherboard that is taken out of a PC, then now is the time to remove all the unnecessary components.
Note: Actually, it is better not to install any other components on the motherboard. You won’t only risk bricking other components if something goes wrong with the motherboard during testing. Still, you can also permanently erase data from your hard disk. So, not worth the risk if you ask me.
4. Plug the PSU Into Power Brick
In the next step, you should connect the PSU to the wall power. This is the last step that involves setting up the motherboard for testing; from the next step, we will get hands-on with testing the motherboard.
Before you plug the cable into the wall socket, ensure that you are grounded and preferably wearing rubber/plastic slippers or flip-flops.
Also, you should be wearing non-conductive electric gloves. They will not only keep you safe but will also keep your motherboard safe from conducting any static charge.
5. Turn on the Motherboard
There are multiple ways by which you can turn on a motherboard; some of them are as follows.
Using the Case to Turn on the Motherboard
To turn the motherboard on using the PC case, your motherboard should be inside the PC case or at least connected to the power button of the PC case.
Connecting the power button of the PC case to the motherboard is not that difficult. Here’s how you can do it.
- Locate the front panel header on the motherboard.
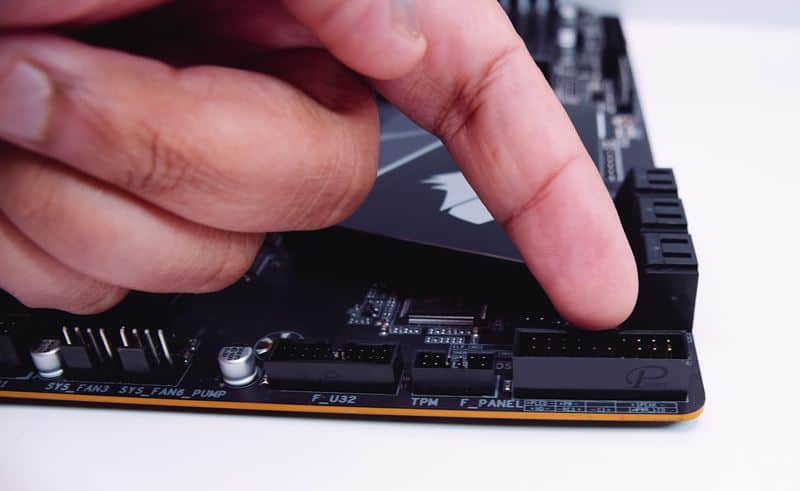
- Identify where the power on switch pins are located on the front panel header. Typically, these are your 3rd and the 4th pins from the left.
- Now, connect the power button cable to the pins labeled +PW- on the front panel header.
Related: What Are Front Panel Connectors/Headers?
Viola! This should do the trick. Now, you can turn on your motherboard by pressing the power button of the PC case. If you are still confused, refer to my article on how to connect front panel connectors to the motherboard.
Use an External Power Switch
If the case power button cable is not long enough, you can use an external power switch to power the motherboard.
Basically, you can assume that an external power switch is the power button used for turning on the motherboard which is outside the case.

They are pretty cheap and easy to get hold of, and you can find one for $5 on Amazon or your local computer hardware store.
Anyhow, these little switches work in the same way as the power button on the case. You plug the cable of this switch into the power on switch pins of the front panel header. The process is the same as the one mentioned above.
Once everything is connected, you simply press the button of the switch to turn on the motherboard.
Manually Jump-Starting the Motherboard
If you are in a hurry and don’t have an external power switch, you can jump-start the motherboard.
For jump-starting a motherboard, you will need a flat-head screwdriver with a small tongue. On the motherboard, find the +PW- pins among the other front panel header pins. Place your screw driver between the two pins in such a way that it touches both of them simultaneously.
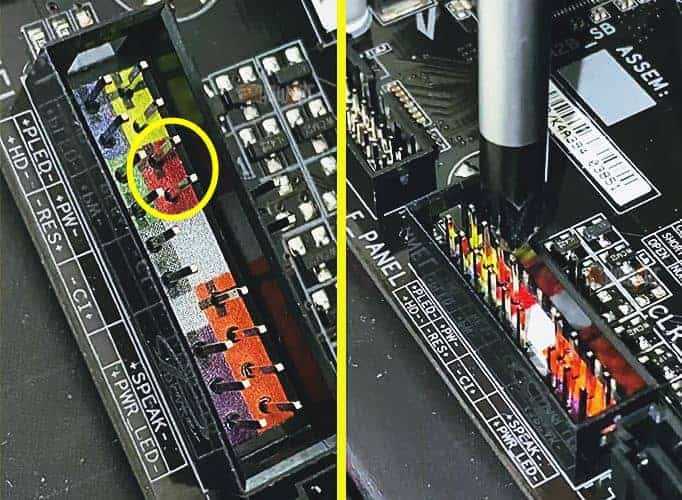
When doing this process, make sure the screwdriver does not touch any other pins. Hold the screwdriver between the two PW pins until you hear a beep and the motherboard turns on.
This marks the end of the process, so let’s see the results.
What Should You Expect After Turning on the Motherboard?
When the motherboard turns on, you will be faced with a black screen. Don’t worry that’s not a bad thing. Remember I talked about earlier how your PC will not pass the POST? Well, this is it.
If your monitor screen stays blank and does not exhibit any unusual behavior, then that’s good. After being in the blank screen state for a while, the motherboard will start beeping or flashing LEDs, which is a telltale sign as to what is wrong with the motherboard.
Here’s how to decode the beeping sounds and the flashing LED of the motherboard.
Beeping Sound Codes
After starting the motherboard, it will give out consistent beeps. These beep codes are indicative of the problem that persists in a motherboard.
However, you will only hear the beep codes if an internal speaker is installed on your motherboard.
This speaker is connected to the front panel header of the motherboard. Usually, the top 4 pins from the right are where this speaker connects, so check them if you do not hear any beeps.
A motherboard will beep one time, twice, thrice, or in any respective order. For example, a motherboard may pause after two beeps; then again, it will give two beeps and pauses. This beeping process will continue for a while.
Of course, the two beeps error is not the only one. Here are some beep code errors.
- 2 Beeps – Reseat/replace memory, troubleshoot motherboard.
- 4 Beeps – Troubleshoot motherboard.
There are a total of twelve different ways in which your motherboard can exhibit beeps. To know more about other beep codes and how to troubleshoot the beeps, refer to the read from PCMag.
Since there is no CPU, RAM, GPU, and other components installed on the motherboard, you will hear beeps, but that is a good thing.
It signifies that the motherboard has recognized that the PC lacks components and hence is giving out code sounds accordingly.
LED Flashes
The beep code sounds are not the only way you get to know if the problem persists with a motherboard. The flashing of the LED light is another telltale sign indicating that an issue exists. Here’s how to decode them.
To know where these LEDs are, refer to your motherboard user manual. Typically, these LEDs are located to the right of the RAM slots.
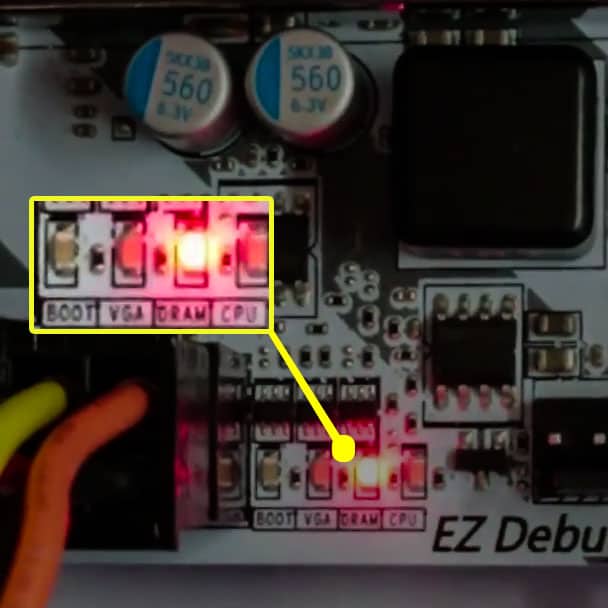
These LED lights are of four types, those being;
- CPU (lights up when there is an issue with the CPU)
- DRAM (lights when there is an issue with the RAM)
- VGA (lights up when there is an issue with the GPU)
- BOOT (lights up when there is an issue with the POST or BIOS)
Since you don’t have the CPU, RAM, and GPU installed on your motherboard, the respective LEDs for these three should light up.
Sigh with relief if they light up because that indicates that the motherboard is working properly. Sometimes, the VGA LED may not light up, but that is fine. The main consideration for our test is that the CPU and the DRAM LEDs should flash at startup.
Related: What the Red Light on a Motherboard Means?
What if There Are No Beeps or LED Flashes?
Don’t panic if you are not getting any beeps or LED flashes when starting your motherboard. It is not always because your motherboard is faulty.
First, check whether the beep code speaker is installed in the front panel header. No speakers mean that no sound will come from the beeps.
You also have to consider the possibility that not all motherboards have LED. If there is no mention of LEDs on your motherboard user manual, that might indicate your motherboard does not come with them.
These two can also be reasons why you are not getting the Beeps, or LED flashes when you power on your motherboard, but what if your motherboard has both of them?
The Outcome of the Test: Motherboards With Beep Code Speaker and LEDs
If your motherboard comes with a beep code speaker and LEDs, but none of the LEDs are lighting up or flashing, and you do not hear any beeps, then you have a faulty motherboard.
Just in case, make sure to switch on the motherboard at least three times to confirm. Even if you are still not getting any response, there is not much you can do.
The only viable option is to return the motherboard and get yourself a replacement. However, manufacturers will require proof, so make sure you record some videos to show them the proof of the motherboard being DOA (Dead on Arrival).
The Outcome of the Test: Motherboards without Beep Code Speaker and LEDs
If your motherboard does not come with a beep code speaker or LEDs, then you cannot distinctively prove if your motherboard is faulty or not.
At least with this method, because there are other methods that you can use for a motherboard with no beep code speaker or LEDs.
Test the Motherboard by Connecting Case Fans
The method for testing the motherboard by connecting case fans is as follows.
- Set up a bench testing station with the motherboard as done in the previous method.
- Plug the case fan into the 4-pin PWM fan header. Consult the motherboard user manual to know the location of the fan header.
- Turn on the motherboard.
- If the case fans start spinning, that indicates the motherboard is working.
Apart from the fans spinning, they will sometimes light up if they have support for RGB. That is totally normal, so even if the fans light up, your conclusion should remain the same – the motherboard is working properly.
Basically, in this method, we want to prove that the motherboard supplies power to the fans. So, case fans lighting up show that the motherboard is indeed working.
While this method is effective however, remember that in this method, we are only testing if the motherboard can supply power to the case fans.
Therefore, any smaller fault related to any individual part of the PCB will not potentially come out with this method.
FAQs
Related Guides
Check out some of our related motherboard buying guides.
- Best Motherboards for Ryzen 5 3600
- Best Motherboards for Ryzen 5 5600X
- Best Motherboards for Ryzen 7 5800X
- Best Motherboards for Ryzen 9 5900X
- Best Motherboards for Gaming
- Best B550 Motherboards
Check out some of the other related motherboard guides.
- When to Upgrade Motherboard?
- What Are PCIe x1 Slots Used For?
- PCIe 3.0 vs 2.0
- How to Test a Motherboard?
- How to Upgrade a Motherboard the Right Way?
- Can You Upgrade CPU Without Changing the Motherboard
- How to Install Motherboard?
Final Thoughts
With everything needed for testing the motherboard without the CPU covered, I would like to mark the end of this article. I hope that the information in this article will clear up all your doubts and help you test the motherboard without the CPU.
To quickly summarize, testing the motherboard without the CPU is not as difficult as you might have observed in the step-by-step guide I told you in this article.
For testing the motherboard without the CPU, all you need is a motherboard, a power supply, some case fans (if need be), and a large desk where you can put all this together.
When testing the motherboard, strictly ensure that the motherboard must not make any direct contact with a metal surface. That is all it takes to test a motherboard without the CPU.
Before signing off, let me know in the comment section if you had any success testing your motherboard by the method I told you above.
The Author Who Worked On This Article
Waleed Madni
A tech enthusiast with the spirit of a competitive gamer. Waleed has been around computers ever since he was young and has witnessed the progress of the machines he loves the most. Fascinated by what tomorrow has to offer, he keeps himself up to date with the latest technology and gaming trends.