Perhaps you want to upgrade your CPU but don’t want to go through the hassle of changing the motherboard. Then this article is for you.
Changing the CPU seems like a fairly ordinary job, but when it comes to changing a motherboard- Hell no! Changing the motherboard is the same as building the PC from scratch, so this begs the question: can you upgrade the CPU without changing the motherboard?
Yes, you can upgrade the CPU without changing the motherboard entirely. However, this is not as straightforward as removing the old CPU and popping the new one in.
You have to ensure that when performing this upgrade, you don’t disturb the compatibility of the PC.
There is nothing to worry about. I will tell you in this article how you can upgrade your CPU without changing the motherboard. Most importantly, without disturbing the compatibility of the PC.
So, without further ado, let’s dive straight into the article.
Why Do We Even Have to Consider the Motherboard When Upgrading the CPU?
Unlike other components of the PC, upgrading the CPU is not that easy, and we often have to factor in upgrading the motherboard as well.
This is due to the fact that the CPU and the motherboard are interrelated. You can envision them as two different parts of a single system. Or better yet, like the lock and the key.
The motherboard is the lock, while the CPU is the key. Like only specific keys can open a lock, only a certain CPU can be installed on a specific motherboard.
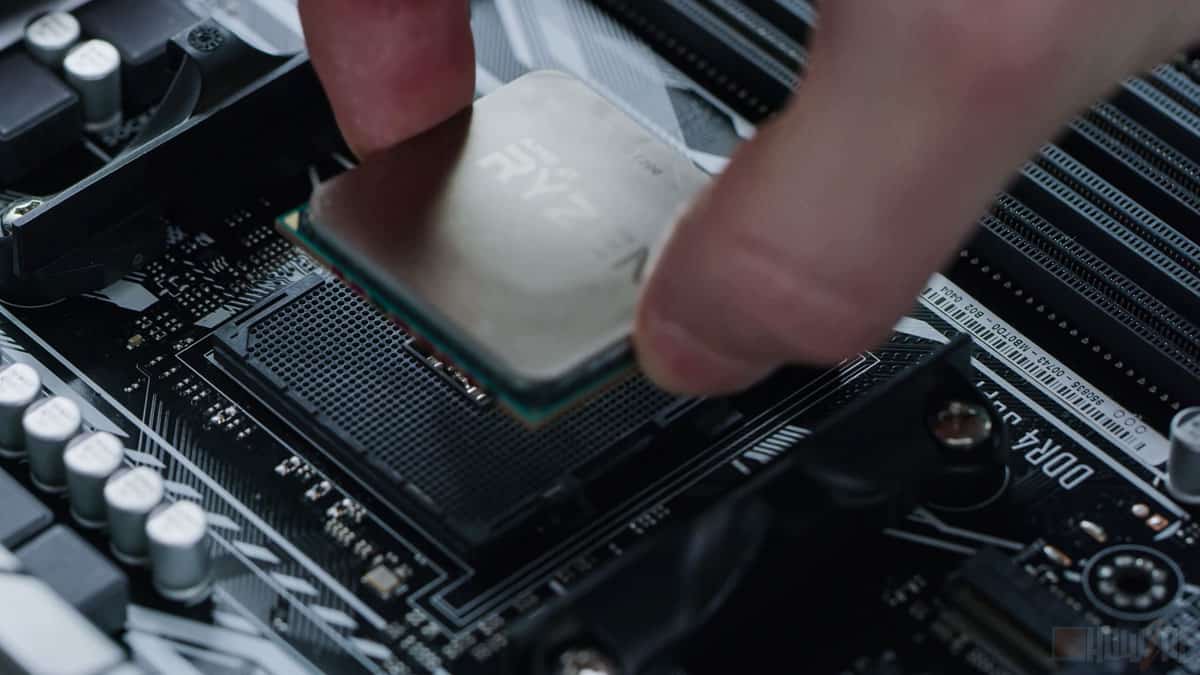
The aspect that keeps this check-in place is called the CPU socket. Long story short, for a CPU to be compatible with the motherboard, the CPU socket of the motherboard should be compatible with the socket found on the underside of the CPU.
Think of this as a piece of a puzzle. The motherboard is a certain-shaped puzzle, and the CPU is the piece that fits into the puzzle.
What Is a CPU Socket?
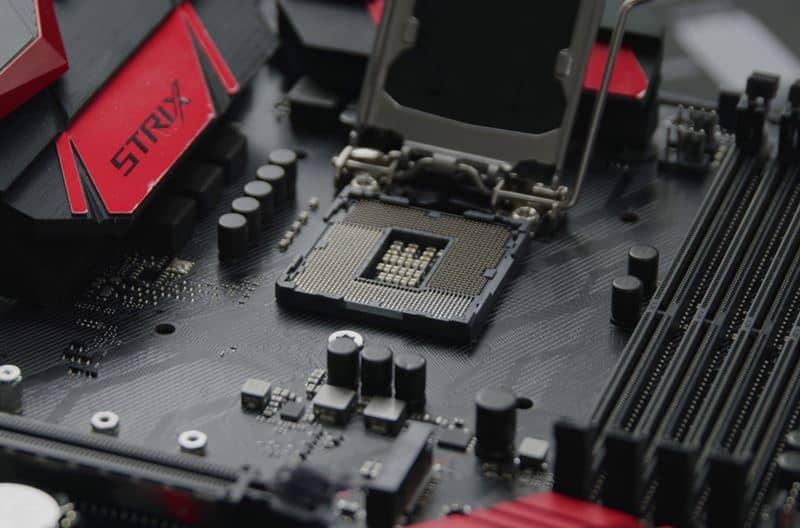
The CPU socket in the motherboard is a slot designated for the processor. This slot is unique than other slots of the motherboard, and it is also located at the center of the motherboard.
Every processor is not compatible with the same CPU socket. Therefore, not every motherboard has the same CPU socket.
CPU socket differs depending on the model and the processor’s generation. Intel and AMD motherboards also come with different CPU sockets. Let’s see the main types of CPU sockets.
What Are the Different Types of Sockets, and How Do They Impact Upgrades?
Motherboards come with three different types of sockets – LGA (Land Grid Array), PGA (Pin Grid Array), and BGA (Ball Grid Array). These three socket types are inherently quite different in how they work and function.
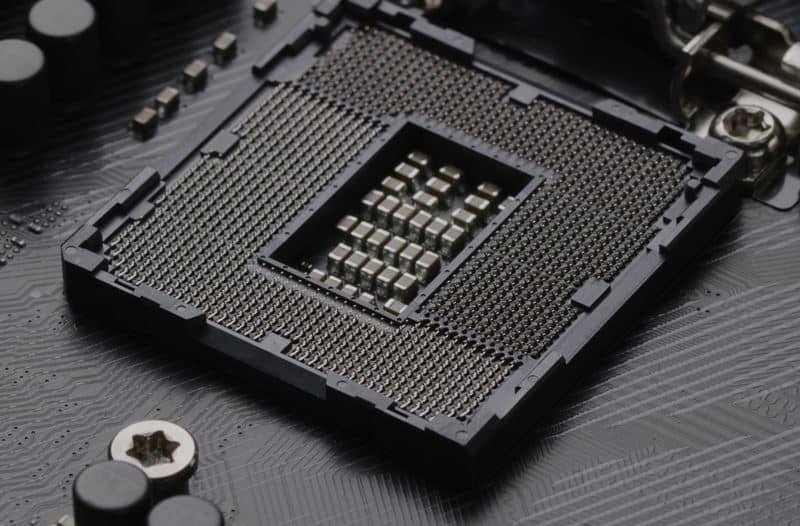
LGA socket has pins jutting out from the motherboard CPU socket, whereas the CPU has a flat contact area. This technique is primarily used by Intel CPUs. The LGA socket supports upgrades, but it is not as versatile as the PGA socket.
The PGA socket does not have any pins on the motherboard CPU socket. Instead, the CPU has pins. Therefore, this socket type supports the easiest upgrades.
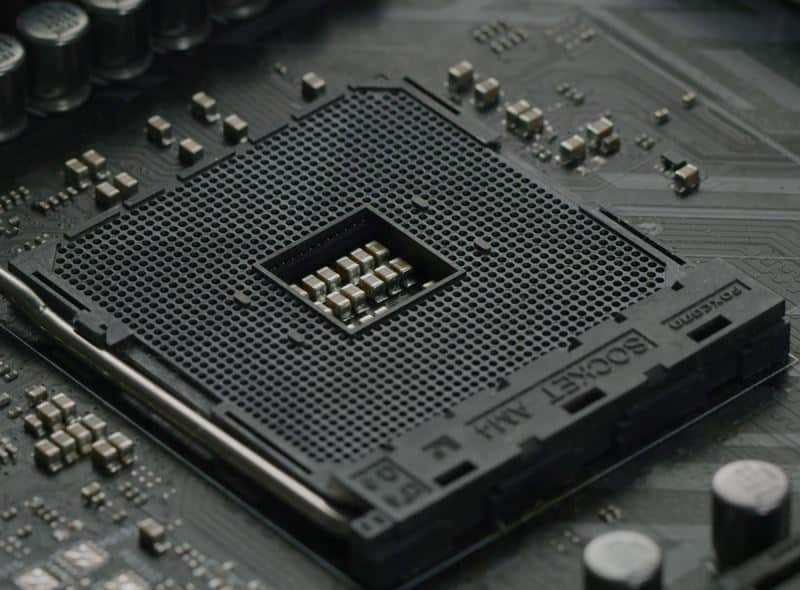
This can also be seen from the fact that AMD motherboards that use the PGA sockets support at least four different generations of CPUs.
As a result, the PGA socket is the most versatile and can be adapted to newer generation CPUs without much hassle.
In the BGA socket, the CPU is soldered to the motherboard. Thus upgrading it is not possible. This socket is found on laptops.
What Is Socket Pin Count?
The socket pin count is the main metric by which CPU sockets are differentiated upon. As the name suggests, the socket pin count refers to the pins or electric contact points between the processor and the motherboard CPU socket.
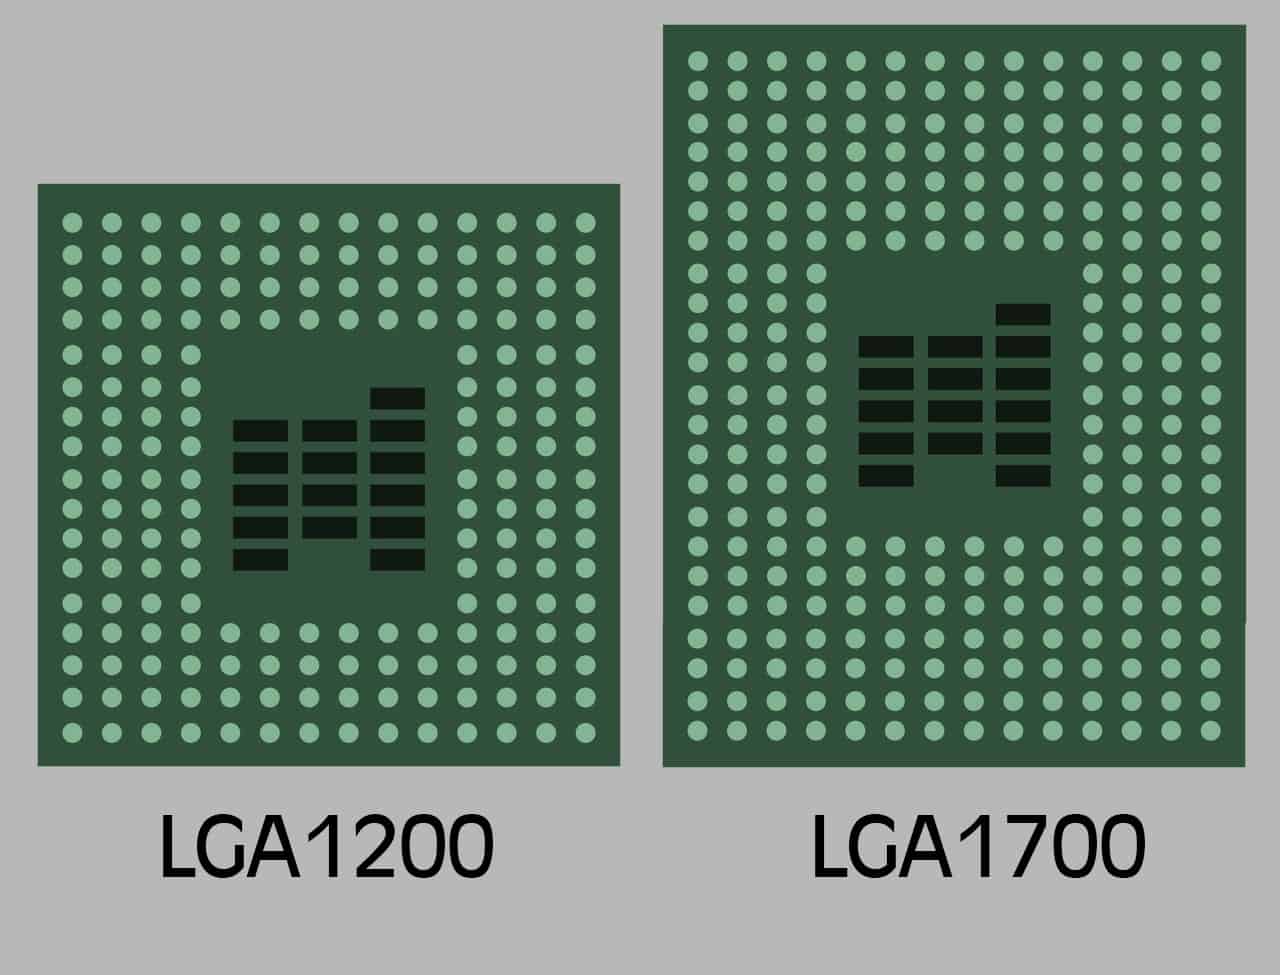
The socket pin count number is typically used in the naming schemes of the different motherboard sockets. For example, the 11th generation Intel processors utilize the LGA1200 socket. In this naming scheme, the “1200” number has not come out of nowhere, but actually, it is refers to the socket pin count.
On the contrary, the newer 13th generation Intel CPU socket is known by its LGA1700 name. The “1700” figure represents that this socket has “1700” socket pin count.
Since the newer Intel 13th generation LGA1700 has a higher pin count than the 11th generation LGA1200 socket, it means that Intel 11th generation processors are not compatible with the LGA1700 motherboard socket.
Some Common Intel and AMD Sockets in Use Today
Many popular sockets are being used on both the AMD and the Intel sides. The following is a list of those sockets and their compatible CPUs.
| Socket Type | Supported CPU |
|---|---|
| LGA1151 | Intel 7th, 8th and 9th Generation Desktop CPUs |
| LGA1200 | Intel 10th and 11th Generation Desktop CPUs |
| AM4 | AMD Ryzen 1000, 2000, 3000, 4000, and 5000 Series Desktop CPUs |
| AM5 | AMD Ryzen 7000 Series Desktop CPUs |
How to Find the Socket Information of the Motherboard and the CPU?
We have babbled enough about sockets and the different CPUs they are compatible with. I am sure you know all of that stuff by now, so you must be wondering how to find the socket information on the motherboard and the CPU.
Don’t worry because next, we will dive straight into that. The following are some of how you can check the socket information.
Checking the Socket of the CPU
The socket supported by the CPU is among the main specs; therefore, the socket information should be provided in the spec sheet regardless of if you are buying an AMD or an Intel CPU.
To view the spec sheet, head to the respective manufacturer’s website and search for the CPU model you are interested in buying. Open its spec sheet and scroll down until you find the sockets supported option.
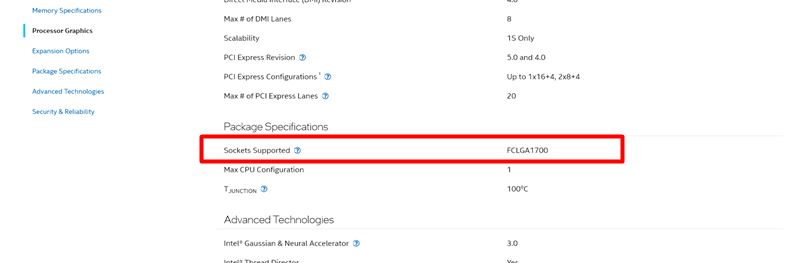
The above picture is of the spec sheet of the Intel Core i7-13700K. The picture shows that the Intel Core i7-13700K supports the LGA1700 socket, the newest Intel socket for the latest 13th-generation processors.
Checking the Motherboard Socket
There are three ways by which you can check the motherboard’s socket, those being
- Checking the motherboard socket through the user manual
- Checking the motherboard socket by looking at the specs online
- Checking the motherboard socket with the built-in Windows specification tool
Checking the Motherboard Socket Through the User’s Manual
Checking the motherboard socket through the motherboard’s user manual is the easiest. Simply take out the user manual booklet from the motherboard box. Find the page that has information on the motherboard socket, and you will get what you need.
Checking the Motherboard Socket by Looking at the Specs Manufacturer’s Website
Type in your motherboard’s complete name that, includes the make, model number, and the series to which it belongs.
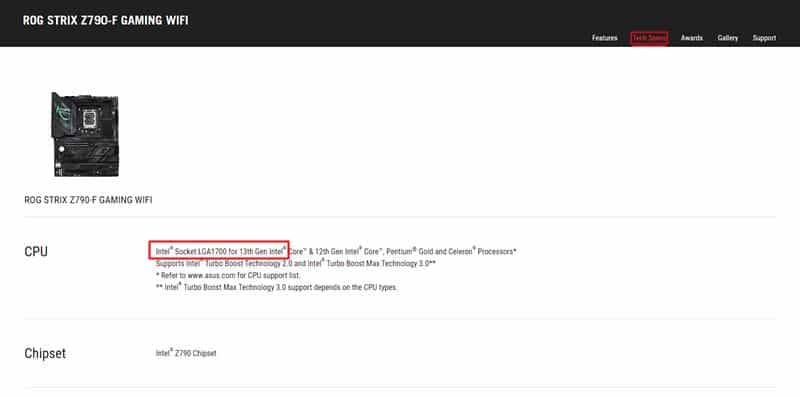
Open your motherboard manufacturer’s website; on it, you will find the motherboard socket type, among other general specs of the motherboard.
Related: How to Check What Motherboard Do I Have?
Checking the motherboard socket with the built-in Windows specification tool
To check your motherboard with the built-in Windows specification tool, you need to do the following.
- Open the run command by pressing the Windows + R key.
- Once opened, type in msinfo32 and click enter.
- Navigate to the Baseboard Manufacturer option to know the make of your motherboard.
- Navigate to the Baseboard Product option to know the model number of your motherboard.
So, Is It Possible to Upgrade the CPU Without Changing the Motherboard Entirely?
If both the socket on the motherboard and the socket supported by the CPU are the same, then yes, you CAN upgrade the CPU without changing the motherboard.
For instance, if you have a motherboard with the LGA1700 socket and are currently using a 13th Gen Intel Core i3 processor, it also supports the LGA1700 socket.
Then you can upgrade to a better processor within the 13th generation itself (i.e., to 13th Gen Intel Core i7 or Intel Core i9) since they use the same LGA1700 socket.
If you have an older 11th gen CPU with the LGA1200 socket, you will not be able to upgrade to a newer 13th-generation CPU. An LGA1200 socket will only accept an Intel 11th-gen CPU. So, let’s say you have an 11th-gen i3; you could upgrade to an 11th-gen i5, i7, or i9.
I hope you get the idea now. Simply put, you can only upgrade within the same generation when not changing the motherboard.
You Should Consider the Motherboard Chipset and the BIOS Version To Ensure Maximum Compatibility
Socket compatibility is the first and foremost important characteristic that determines whether you can install a newer CPU on a motherboard or not.
However, the motherboard chipset model is sometimes equally important, particularly the details regarding the release date of the chipset in relation to the CPU you want to upgrade to.
A socket can remain the same across multiple CPU and motherboard chip generations. However, suppose a CPU is newer compared to the motherboard chipset. In that case, it can give rise to BIOS Version compatibility issues.
Take the mid-range B series AMD motherboards, for instance. The older AMD B350 released in 2017, AMD B450 released in 2018, and the B550 released in 2020 all feature the AM4 socket.
However, the earliest B350 was released when the Ryzen 1000 series CPU hit the market. Therefore, if you were to install the newest 5000 series CPU on a B350 motherboard, it would most likely not work despite the sockets being compatible.
Why? Simply because the stock B350 chipset uses the older BIOS version. Therefore, the simplest solution here is to update the BIOS to the latest version or the version that specifically supports the CPU you want to upgrade to.
Related: How to Update Motherboard BIOS
FAQs
Related Guides
Check out some of our related motherboard buying guides.
- Best Ryzen 5 3600 Motherboards
- Best Ryzen 5 5600X Motherboards
- Best Ryzen 7 5800X Motherboards
- Best Ryzen 9 5900X Motherboards
- Best Gaming Motherboards
- Best B550 Motherboards
Check out some of the other related motherboard guides.
- When to Upgrade Motherboard?
- How to Test a Motherboard?
- How to Upgrade a Motherboard the Right Way?
- How to Install Motherboard?
- How to Test Motherboard Without CPU?
- The Ultimate Guide to MSI EZ Debug LEDs Troubleshooting
Final Thoughts
With all the main points gone over, it is time to wrap up the article.
For a quick recap, I want to iterate on the importance of sticking to the existing CPU socket of your motherboard for upgrading the CPU.
Ensure that the CPU you buy is of the same generation as your previous CPU; otherwise, it will not be compatible. Ultimately, you will need to change the motherboard as well, and as we all know, that is a very tedious and time-consuming task.
Also, pay close attention to the BIOS version because, at times, the BIOS version of the motherboard may not support the CPU that you want to upgrade to.
If you keep these two basic checks in mind, you will never have an in-compatible motherboard when upgrading the CPU.
I hope the article was helpful. Before you go, let me know which processor you currently have your eyes on.
The Author Who Worked On This Article
Waleed Madni
A tech enthusiast with the spirit of a competitive gamer. Waleed has been around computers ever since he was young and has witnessed the progress of the machines he loves the most. Fascinated by what tomorrow has to offer, he keeps himself up to date with the latest technology and gaming trends.