
Hello future .NET developers! Today, we’re going to dive into an exciting topic – integrating PostgreSQL with Visual Studio using a tool called DotConnect. But before we start, let’s understand a few basic things.
What Is DotConnect for Postgresql?
DotConnect for PostgreSQL is a powerful tool that acts as a bridge between your .NET applications and PostgreSQL databases. Think of it as a translator that allows these two different languages – the .NET framework and PostgreSQL database – to understand each other.
Why Use DotConnect for Postgresql?
Now, you might ask, “Why do we need this translator?” That’s a great question. As you know, databases are essential in almost all applications, and PostgreSQL is one of the most popular ones out there. However, to work with PostgreSQL in .NET applications, we need a way to ‘connect’ them, and that’s where DotConnect comes in. It helps us manage this connection efficiently and effectively.
DotConnect and Visual Studio – A Great Duo
Visual Studio is a fantastic platform where we write our .NET applications, right? Now, wouldn’t it be cool if we could manage our PostgreSQL databases directly from there? Guess what, DotConnect makes it possible!
It integrates seamlessly with Visual Studio, allowing us to work with our PostgreSQL databases without leaving our favorite development environment. From setting up connections and customizing properties to running queries – we can do it all directly in Visual Studio.
So, in this guide, we will explore how to use .NET PostgreSQL within Visual Studio, making our database operations smoother and our development process more efficient. Let’s get started!
Step 1: Setting up Server Explorer
Alright, now that we know what DotConnect for PostgreSQL is and why we need it, let’s start with our first step – Setting up the Server Explorer.
What Is Server Explorer?
Server Explorer is like a control panel inside Visual Studio. It’s where we can manage and explore our databases, servers, and other important resources for our application. It’s a handy tool that allows us to peek into the structures of our databases, such as tables, views, stored functions, types, sequences, and so on.
How to Access Server Explorer
Accessing Server Explorer is pretty straightforward. Just go to the ‘View’ menu in Visual Studio, and you’ll find ‘Server Explorer’ – click on it, and the Server Explorer window will appear. Easy, right?
Opening Data Connections and Exploring Databases
Once you’re in the Server Explorer, you’ll notice a node named ‘Data Connections’. This is where we manage our database connections. To add a new connection, right-click on ‘Data Connections’ and click on ‘Add Connection.’
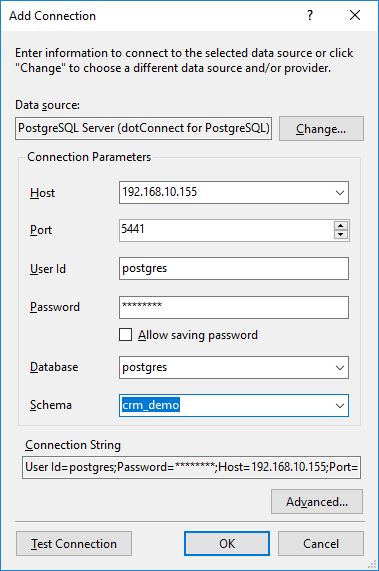
You’ll see a dialog box where you can enter the details of your PostgreSQL database, such as the hostname (or IP address), port, user ID, password, and the name of the database you want to connect to. Fill in the information, and don’t forget to click on ‘Test Connection’ to make sure everything is set up correctly.
Once the connection is added, you can explore your database. Click on the little arrow next to your connection to expand it, and you’ll see a structure of your database – tables, views, functions, and so on. Feel free to click around and explore!
And there you have it – your Server Explorer is set up and ready to go. Now, managing your PostgreSQL databases is just a few clicks away, right inside your Visual Studio. On to the next step!
Step 2: Using the Add/Modify Connection Dialog Box
Now that your Server Explorer is set up, you’ll need to understand how to use the Add/Modify Connection Dialog Box.
- Access the Dialog Box: Go to the Tools menu and select ‘Connect to Database’, or right-click on ‘Data Connections’ in Server Explorer and choose ‘Add Connection’ or ‘Modify Connection’.
- Fill in Details: Input your database information – host, port, user ID, password, and database name. Don’t forget to test your connection!
Step 3: Exploring Advanced Properties
For some projects, you might need to set specific connection parameters. This is where the Advanced Properties dialog box comes in.
- Access the Dialog Box: Right-click on your connection in Server Explorer and select ‘Properties.’
- Customize Your Connection: Here, you can tweak your connection settings to suit your project’s needs.
Step 4: Using the Data Source Wizard
Data Source Wizard helps you create and edit data sources in your application.
- Run the Wizard: You can find ‘Add New Data Source’ from the Data menu, Data Sources Window, or the DataSource property of bindable Windows Forms controls.
- Follow the Steps: Choose ‘Database’ as the data source type, then ‘Dataset,’ then click ‘New Connection’. Change the data source to PostgreSQL Server, provide login information, and select the database objects to include in the dataset.
Step 5: Configuring Tableadapters
TableAdapters are responsible for retrieving data from your database and filling your DataTables with it.
- Access the Wizard: Right-click on your DataSet in Server Explorer and select ‘Add’ > ‘TableAdapter.’
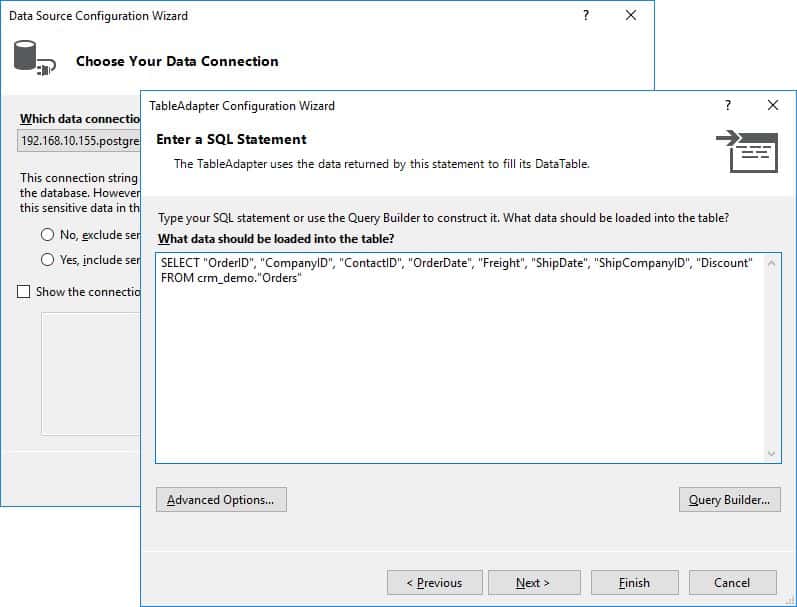
- Configure Your TableAdapter: You can base your TableAdapter on SQL statements you enter or on existing stored procedures in the database.
Step 6: Using Parametrized Tableadapter Queries
Parametrized queries let you filter the data you retrieve based on certain conditions.
- Add a Parametrized Query: You can do this in the DataSet Designer or during the creation of data-bound forms with the ‘Parametrize Data Source’ command on the Data menu.
- Use the Query: You can now use this query to retrieve data that meets certain conditions.
Step 7: Using the Web SQL Data Source Wizard
Finally, let’s look at how to use the Web SQL Data Source Wizard, which is similar to the Data Source Configuration Wizard.
- Open the Wizard: In Visual Web Developer, open an .aspx page, switch to Design view, drag a bindable server control onto the page, click ‘Show Smart Tag’, and select ‘New data source’.
- Follow the Steps: Similar to the Data Source Configuration Wizard, you’ll choose ‘Database’ as the data source type, then ‘Dataset,’ then ‘New Connection.’ Provide login information and select database objects to include in the dataset.
And that’s it! These are the basics of integrating DotConnect for PostgreSQL with Visual Studio. Take your time with each step, and don’t hesitate to explore and experiment. Happy coding!